
# Using published services in other applications
Connect QGIS, ArcGIS Online, Aphex, a web map or a script to a published Civillo service.
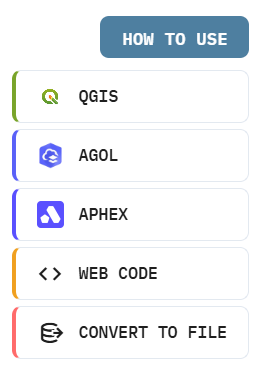
Once a layer is published you consume it from your project's service URL on pub.civillo.com (opens new window) rather than from Civillo itself. Each collection, service and imagery layer page in the portal has a HOW TO USE button in the top-right corner that opens step-by-step instructions for that specific layer, pre-filled with the correct endpoint. That button is the easiest way to learn how a service can be used in another application. The notes below explain what each option gives you so you know which one to use.
TIP
The HOW TO USE helper is only shown on tablet-sized screens and larger.
# Getting to the right page
- Open your project's service URL, or click one of the quick links on the Publish GIS services administration page.
- Choose the service - OGC API - Features, ESRI Vector Tile Service, or Web Map Tile Service.
- Open the collection, service or imagery layer you want.
- Click HOW TO USE.
Which options appear depends on the service:
| OGC API - Features | ESRI Vector Tile Service | WMTS | |
|---|---|---|---|
| QGIS | ✓ | ✓ | ✓ |
| ArcGIS Online | ✓ | ✓ | ✓ |
| Aphex | ✓ | ✓ | |
| Web code | ✓ | ✓ | |
| Python | ✓ | ||
| Convert to file | ✓ | ✓ |
# QGIS
The QGIS (opens new window) option gives you a QGIS layer definition file (opens new window) (.qlr) to download. This is more useful than a bare URL: the file carries the connection details and the layer's styling, symbols, labelling and attribute definitions, so the layer arrives in QGIS looking close to how it looks in Civillo.
- In the HOW TO USE menu, click QGIS.
- Click Download QGIS Layer Definition (.qlr).
- In QGIS, go to Layer → Add Layer → Add Layer Definition File, select the downloaded file and click Open.
You can also drag the .qlr file onto the QGIS Layers or Browser panel.
The layer remains a live connection to the published service, so it picks up changes when the Civillo layer is revised.
# ArcGIS Online and ArcGIS Pro
The ArcGIS option gives you the service URL to copy, along with the steps for ArcGIS Online Map Viewer:
- In the HOW TO USE menu, click AGOL and copy the endpoint shown.
- In ArcGIS Online Map Viewer, under Layers, click Add, then Add Layer from URL.
- Paste the endpoint and click Next.
- Rename the layer from its service identifier (for example
L28) to something meaningful. - Click Add to map.
For a styled basemap layer use the ESRI Vector Tile Service. Remember it is tiles-only, so you can display and style it but not query or edit it - if you need attributes in ArcGIS, use the OGC API - Features endpoint instead.
# Aphex
Aphex (opens new window) is planning software for construction delivery teams and can consume the imagery and tile services directly.
- In the HOW TO USE menu, click APHEX and copy the endpoint shown.
- In Aphex, open your account and select your project, then go to Settings → Locations and click Create Location.
- Paste the endpoint as the Layer URL and adjust the Layer Name.
- To add a single layer rather than all of them, choose Custom Selections and select the layer.
- Click Confirm.
# Web code
WEB CODE shows a ready-made HTML and JavaScript snippet that draws the layer in a MapLibre GL JS (opens new window) map, with a copy button. Paste it into your own page as a starting point - it already references the correct endpoint and style for the layer you opened it from.
# Python
PYTHON shows a Python snippet, again with a copy button, that requests the collection's features and writes them out. Use it as a template for scripted extracts or scheduled jobs. Nothing is downloaded for you here; you run the code yourself.
# Convert to a file
CONVERT TO FILE produces a downloadable dataset from a published vector layer, styled and in the projection you nominate. Use it when someone needs a deliverable rather than a live connection.
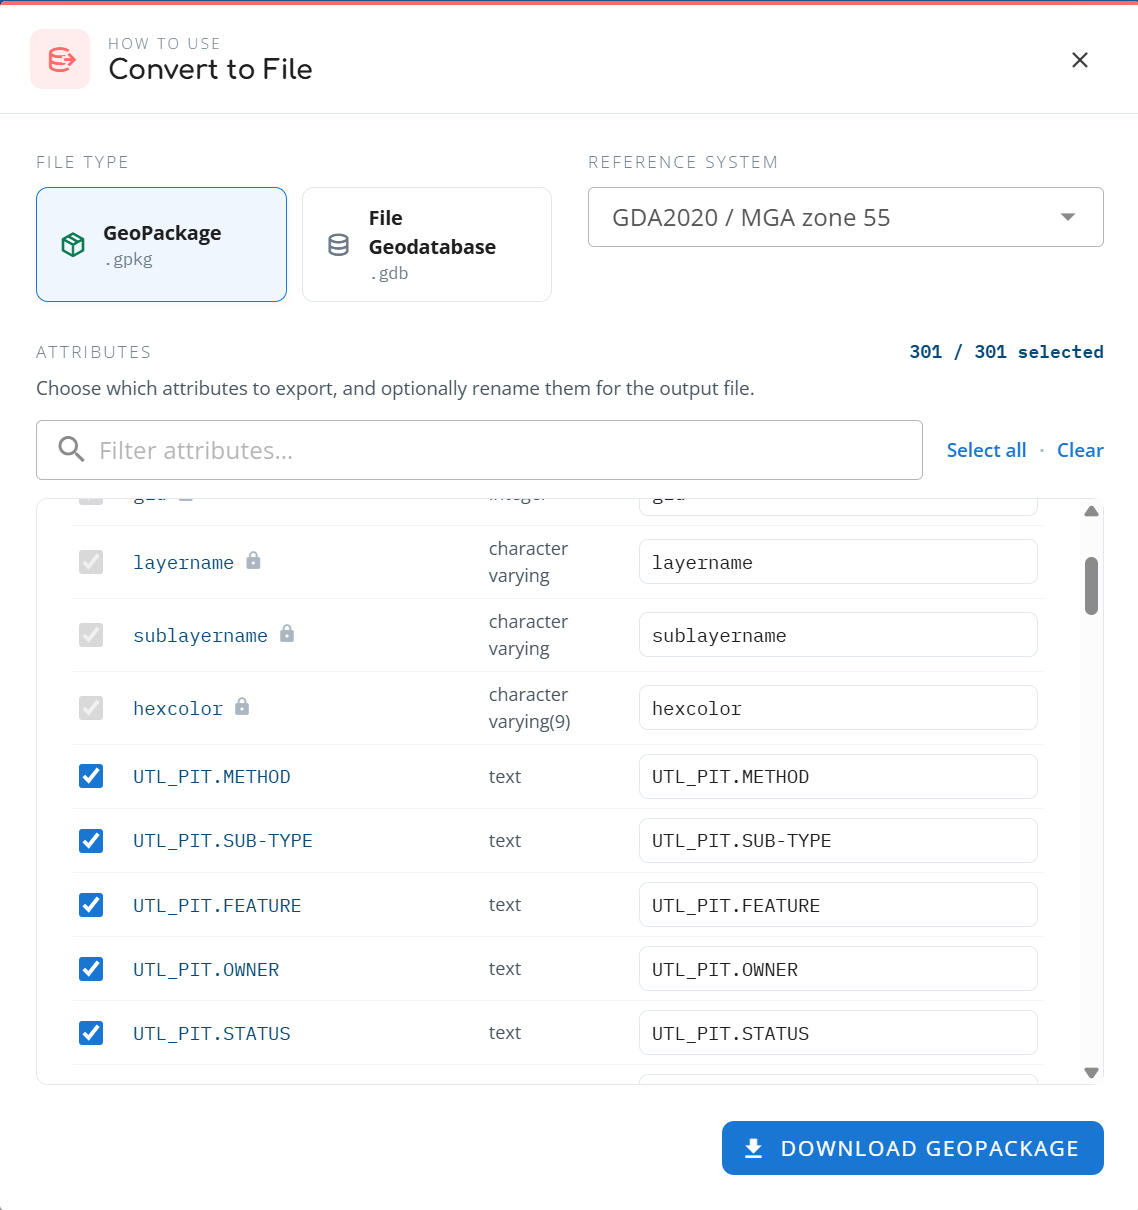
This is the part of publishing that closes the loop on deliverable datasets. Preparing a dataset for a client, a principal contractor or an asset owner usually means three things: reproject it to the coordinate system named in the specification, drop the attributes the recipient should not receive, and rename the rest to the field names they have asked for. Those steps are normally done in a separate data-transformation tool sitting between Civillo and the recipient. Convert to file does them inside Civillo, so the deliverable can be produced - and reproduced when the data changes - from the browser by the person who owns the data.
# Choose a format
| Format | Delivered as | How styling arrives |
|---|---|---|
| GeoPackage (default) | A single .gpkg file | Carried inside the file; QGIS applies it on load |
| Esri File Geodatabase | A .zip containing the .gdb and a companion .qlr | Open the .qlr in QGIS to load every layer already styled |
Both formats are generated from the same symbology as the rest of the published service, so a layer looks the same however you take it.
# GeoPackage styling
GeoPackage carries styling natively. The export writes the layer's symbology into the file itself. Add the .gpkg to QGIS the normal way - there is nothing to import alongside it - and each layer draws with its Civillo colors, per-sublayer categories, labels and field aliases already applied.
# File Geodatabase styling
A File Geodatabase cannot hold QGIS styling inside it, so the styling ships beside it. The .zip contains the .gdb plus a QGIS layer definition file (.qlr) at the top level:
- Extract the
.zip, keeping the.qlrnext to the.gdb. The.qlrrefers to the.gdbby a relative path, so the pair works wherever you extract them, but they must stay together. - In QGIS, go to Layer → Add Layer → Add Layer Definition File and open the
.qlr, or drag it onto the Layers panel. - Every exported geometry layer loads from the
.gdb, already styled and labelled.
If you only want the raw data, add the .gdb to QGIS or ArcGIS directly and ignore the .qlr.
# Choose and rename attributes
The Attributes section is where a deliverable is shaped. Attributes are grouped by geometry type, and for each one you can:
- Include or exclude it. Untick an attribute and it is not written to the output file at all. Select all and Clear act on the whole list or on one geometry group, and the filter box narrows a long attribute list by name.
- Rename it. Type the output name in the Rename to column. The original name is shown as the placeholder, so anything you do not rename keeps its Civillo name. Renames flow through to the styling as well, so field aliases in the exported file match the columns you have named.
Whole geometry types can be excluded too: untick a geometry group and none of its features or attributes are exported.
A small number of columns are required and cannot be excluded or renamed - the feature identifier and the columns that carry Civillo's styling. They are marked with a padlock. Everything else is yours to shape.
# Attribute presets
Renames are remembered per layer. The next time you open CONVERT TO FILE for the same layer, the rename fields are pre-filled with what you used last time, so a recurring deliverable does not have to be re-specified each issue. If a remembered rename refers to an attribute the layer no longer publishes, a note says so and the export continues without it.
Which attributes are included is not remembered - that choice is made fresh each time, so a preset can never quietly change what a deliverable contains.
# Notes and limits
- A file export is a point-in-time copy. It will not update when the Civillo layer is revised - for that, connect to the service instead, or run the export again.
- Exports are generated on demand and are subject to a size limit (500 MB by default) and a time limit (five minutes per geometry type). A very large layer may need to be exported with fewer attributes, or one geometry type at a time.
# Reading the features directly
If you are writing your own integration and do not want a helper, request the features straight from the OGC API - Features endpoint:
{service URL}/oapif/collections/{collectionId}/items
The response is GeoJSON in EPSG:4326. See
Available services for the supported query parameters, paging behaviour and limits, and /oapif/api for the service's OpenAPI description.