# Documents
For each of these tasks, open your project, click Administration from the navigation bar then click Documents in the left sidebar.
# Upload document files
To upload documents, follow the steps below.
Under Documents, click Upload File and choose one or many documents to upload.
Optionally assign tags by separating them with commas as shown below.
Optionally associate the document(s) with layers as shown below.
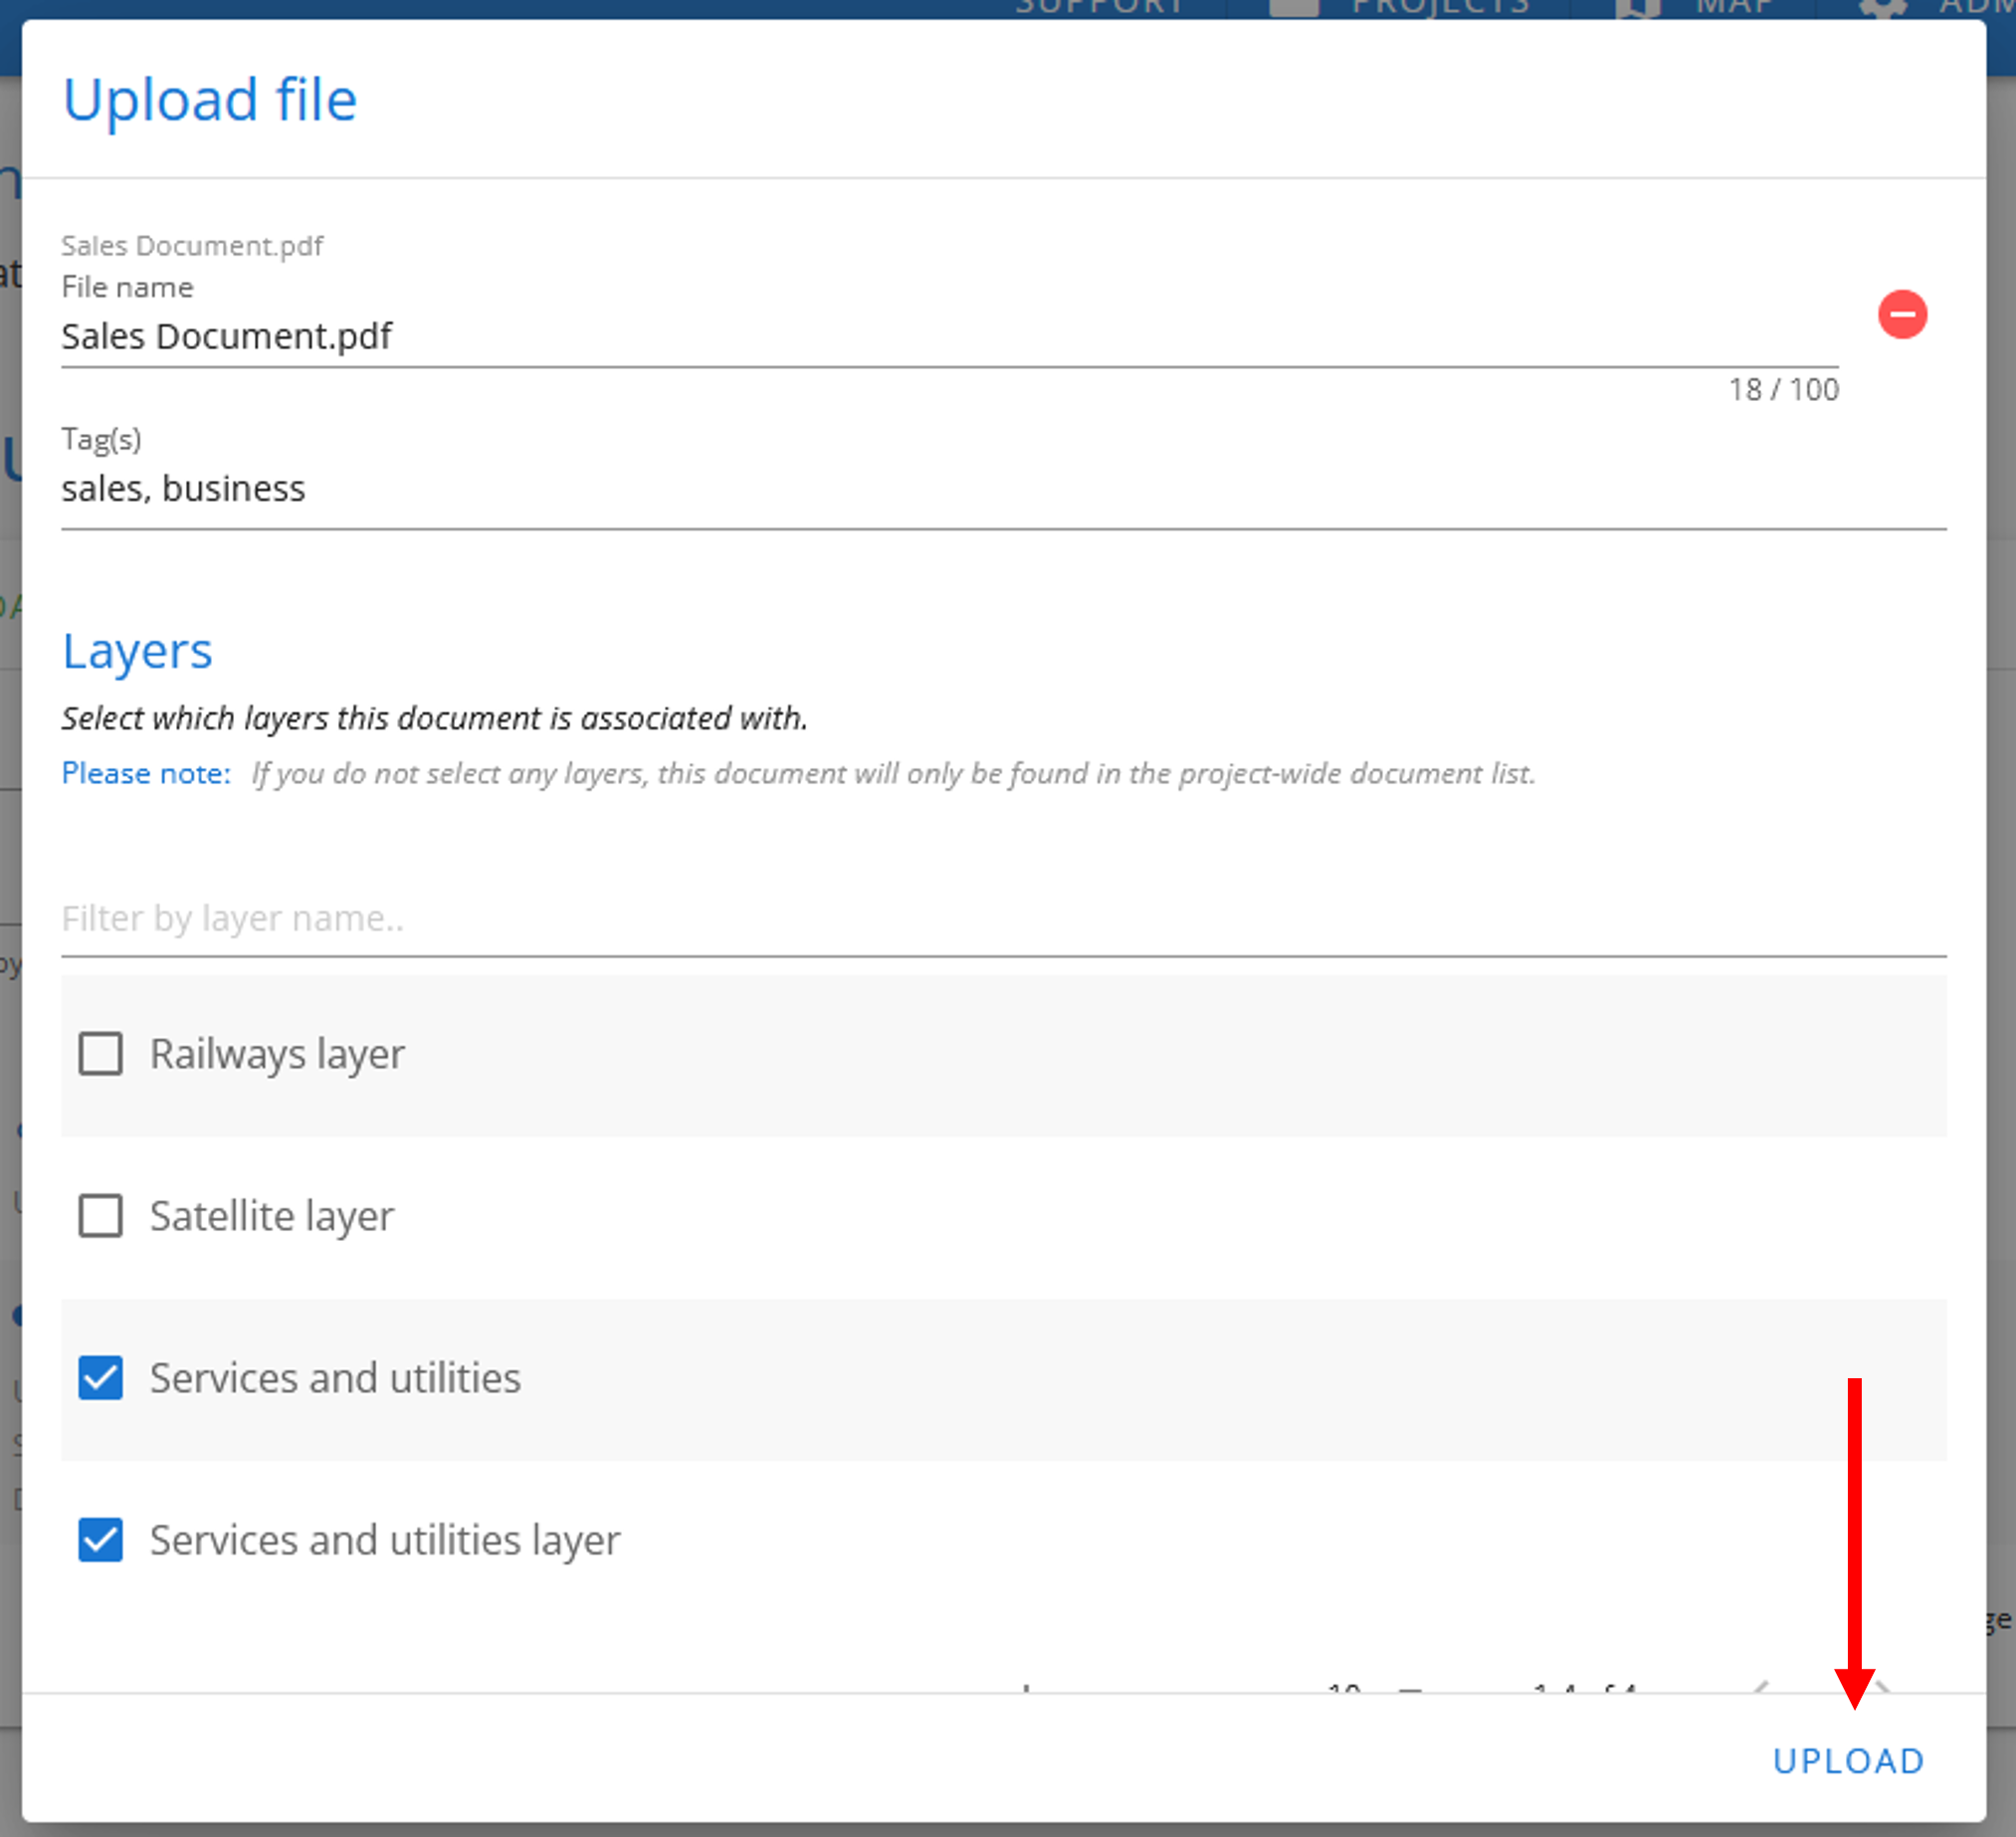
- Click Upload in the popup shown above. The document will then be shown in the list of documents with a
 icon.
icon.
# Upload documents via link
To upload documents, follow the steps below.
- Under Documents, click Upload Link and enter the URL to the desired document as well as a name for this linked document in the appropriate fields shown below.
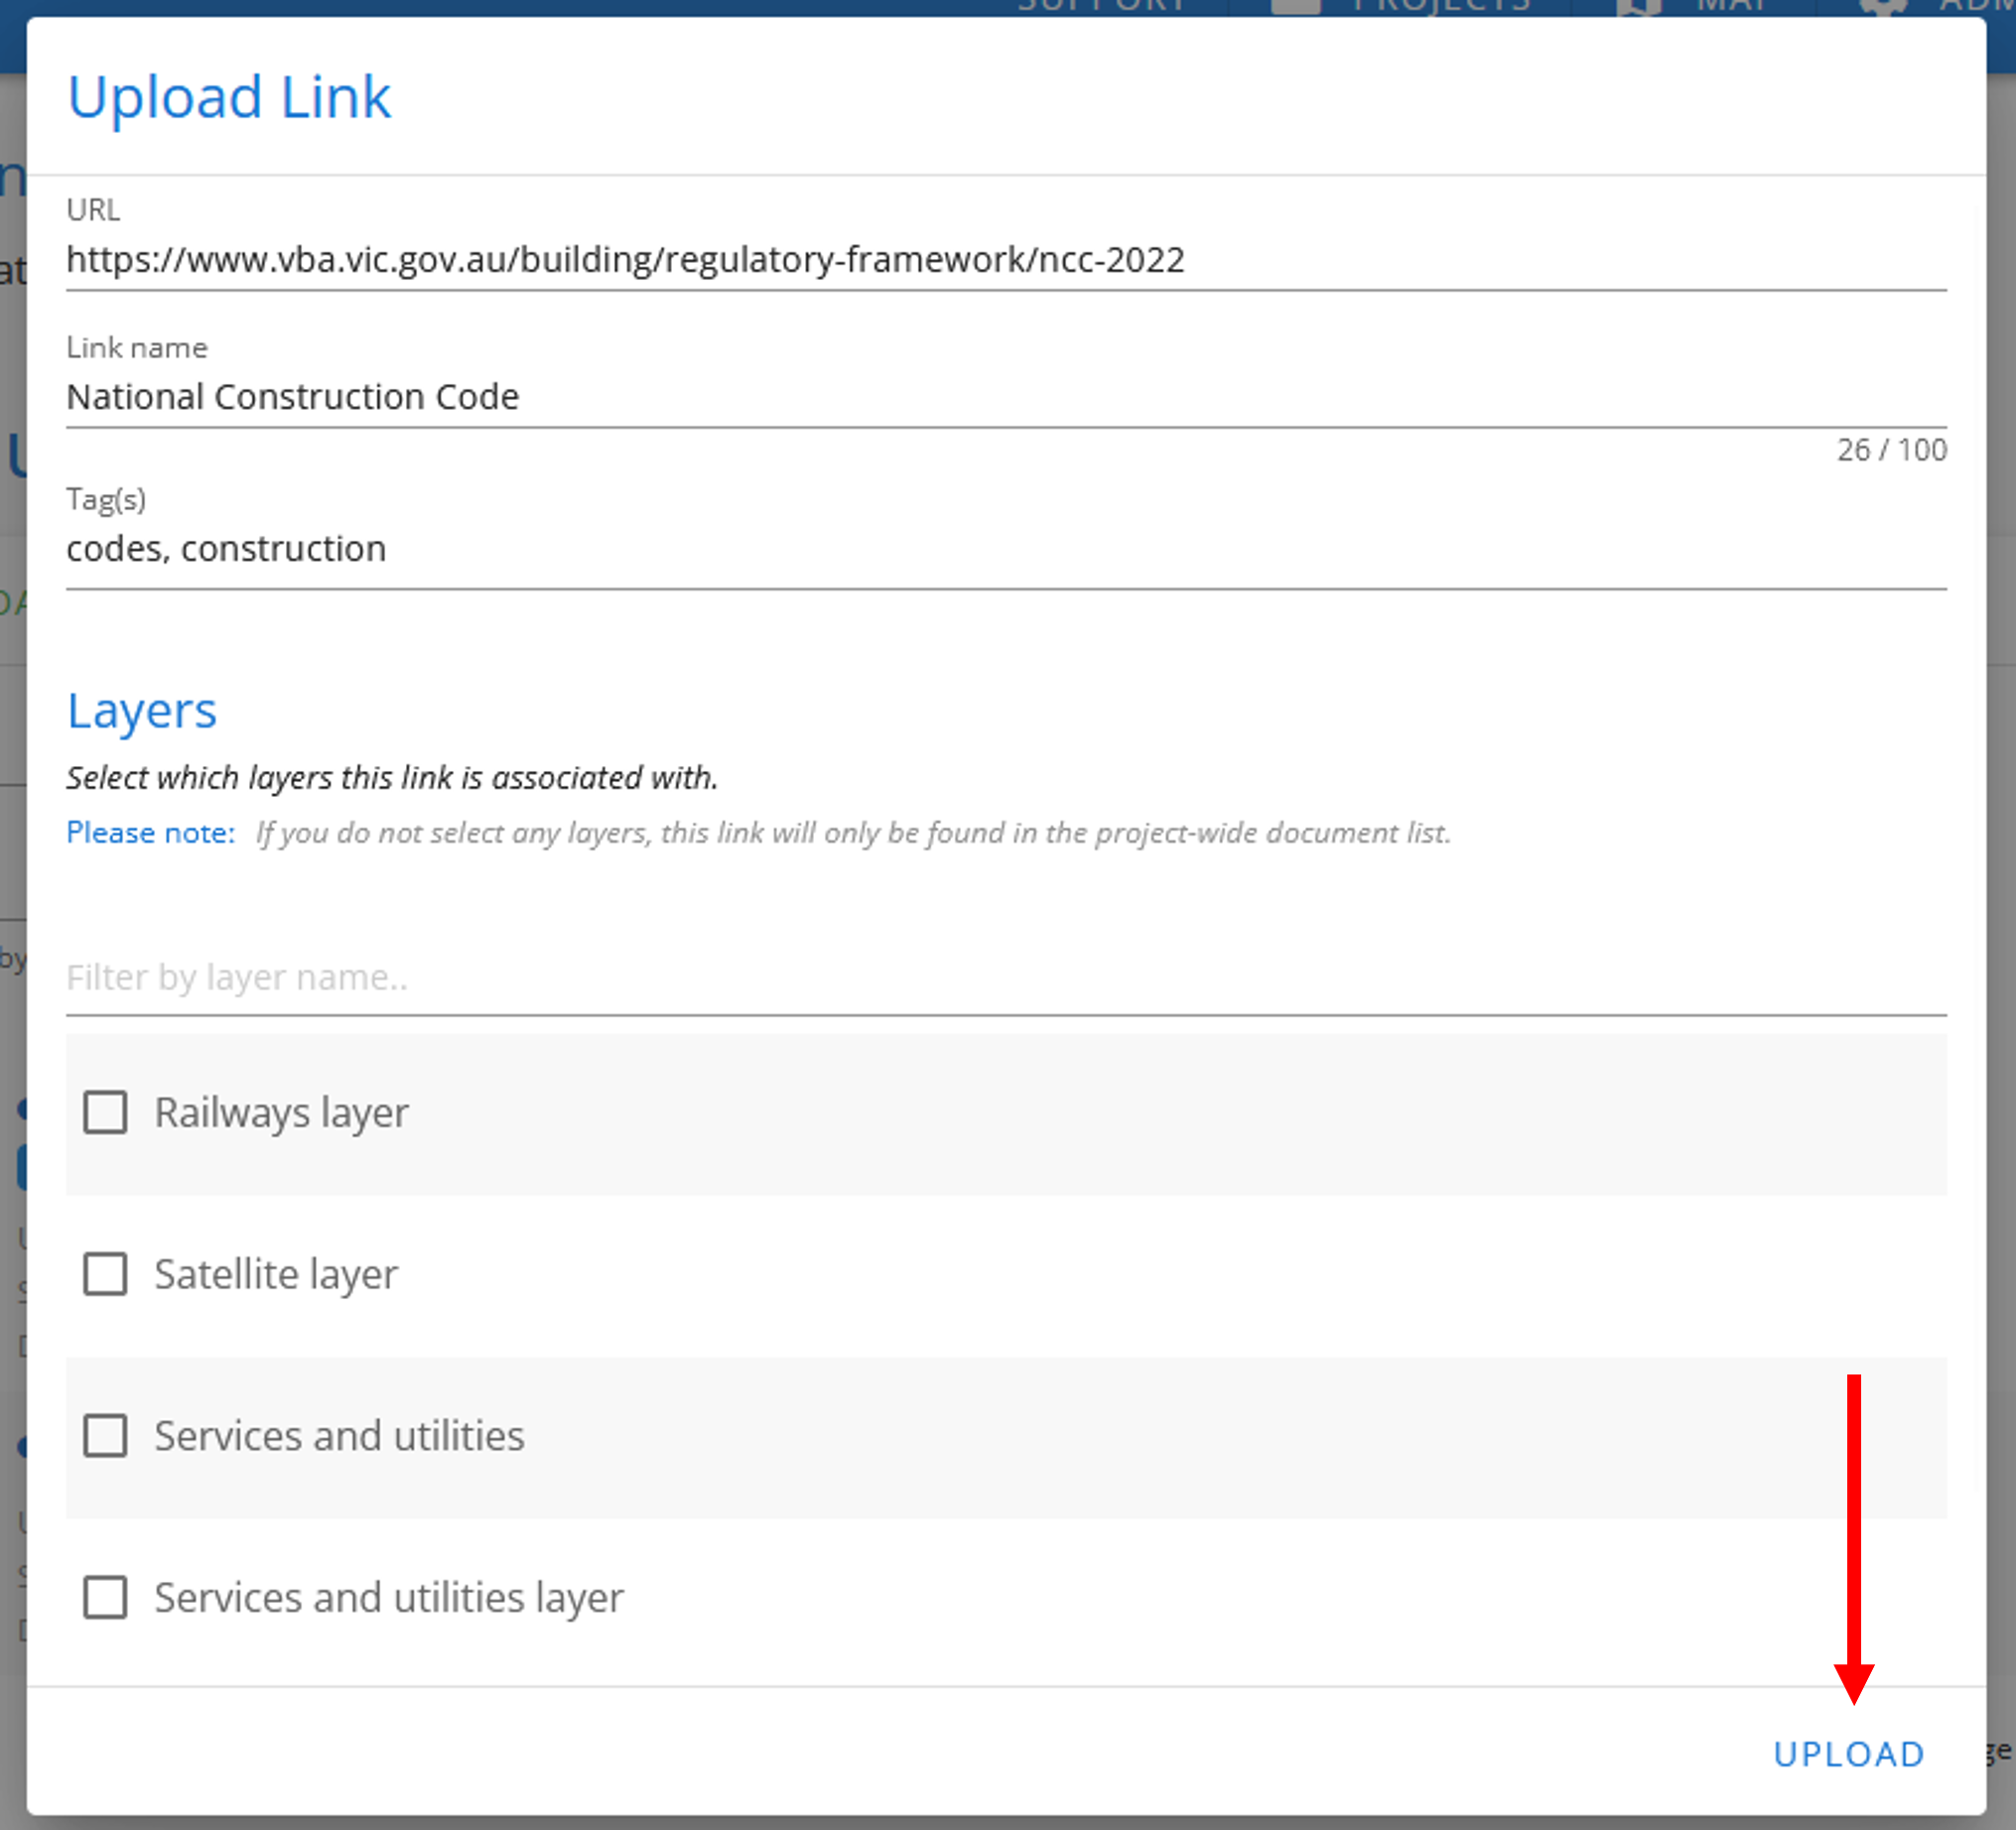
Optionally assign tags and associate layers as per file documents.
Click Upload in the popup shown above. The document link will then be shown in the list of documents with a
 icon.
icon.
# Edit a document
To edit a document's information, follow the steps below.
- Select the desired document by clicking its checkbox as shown below.
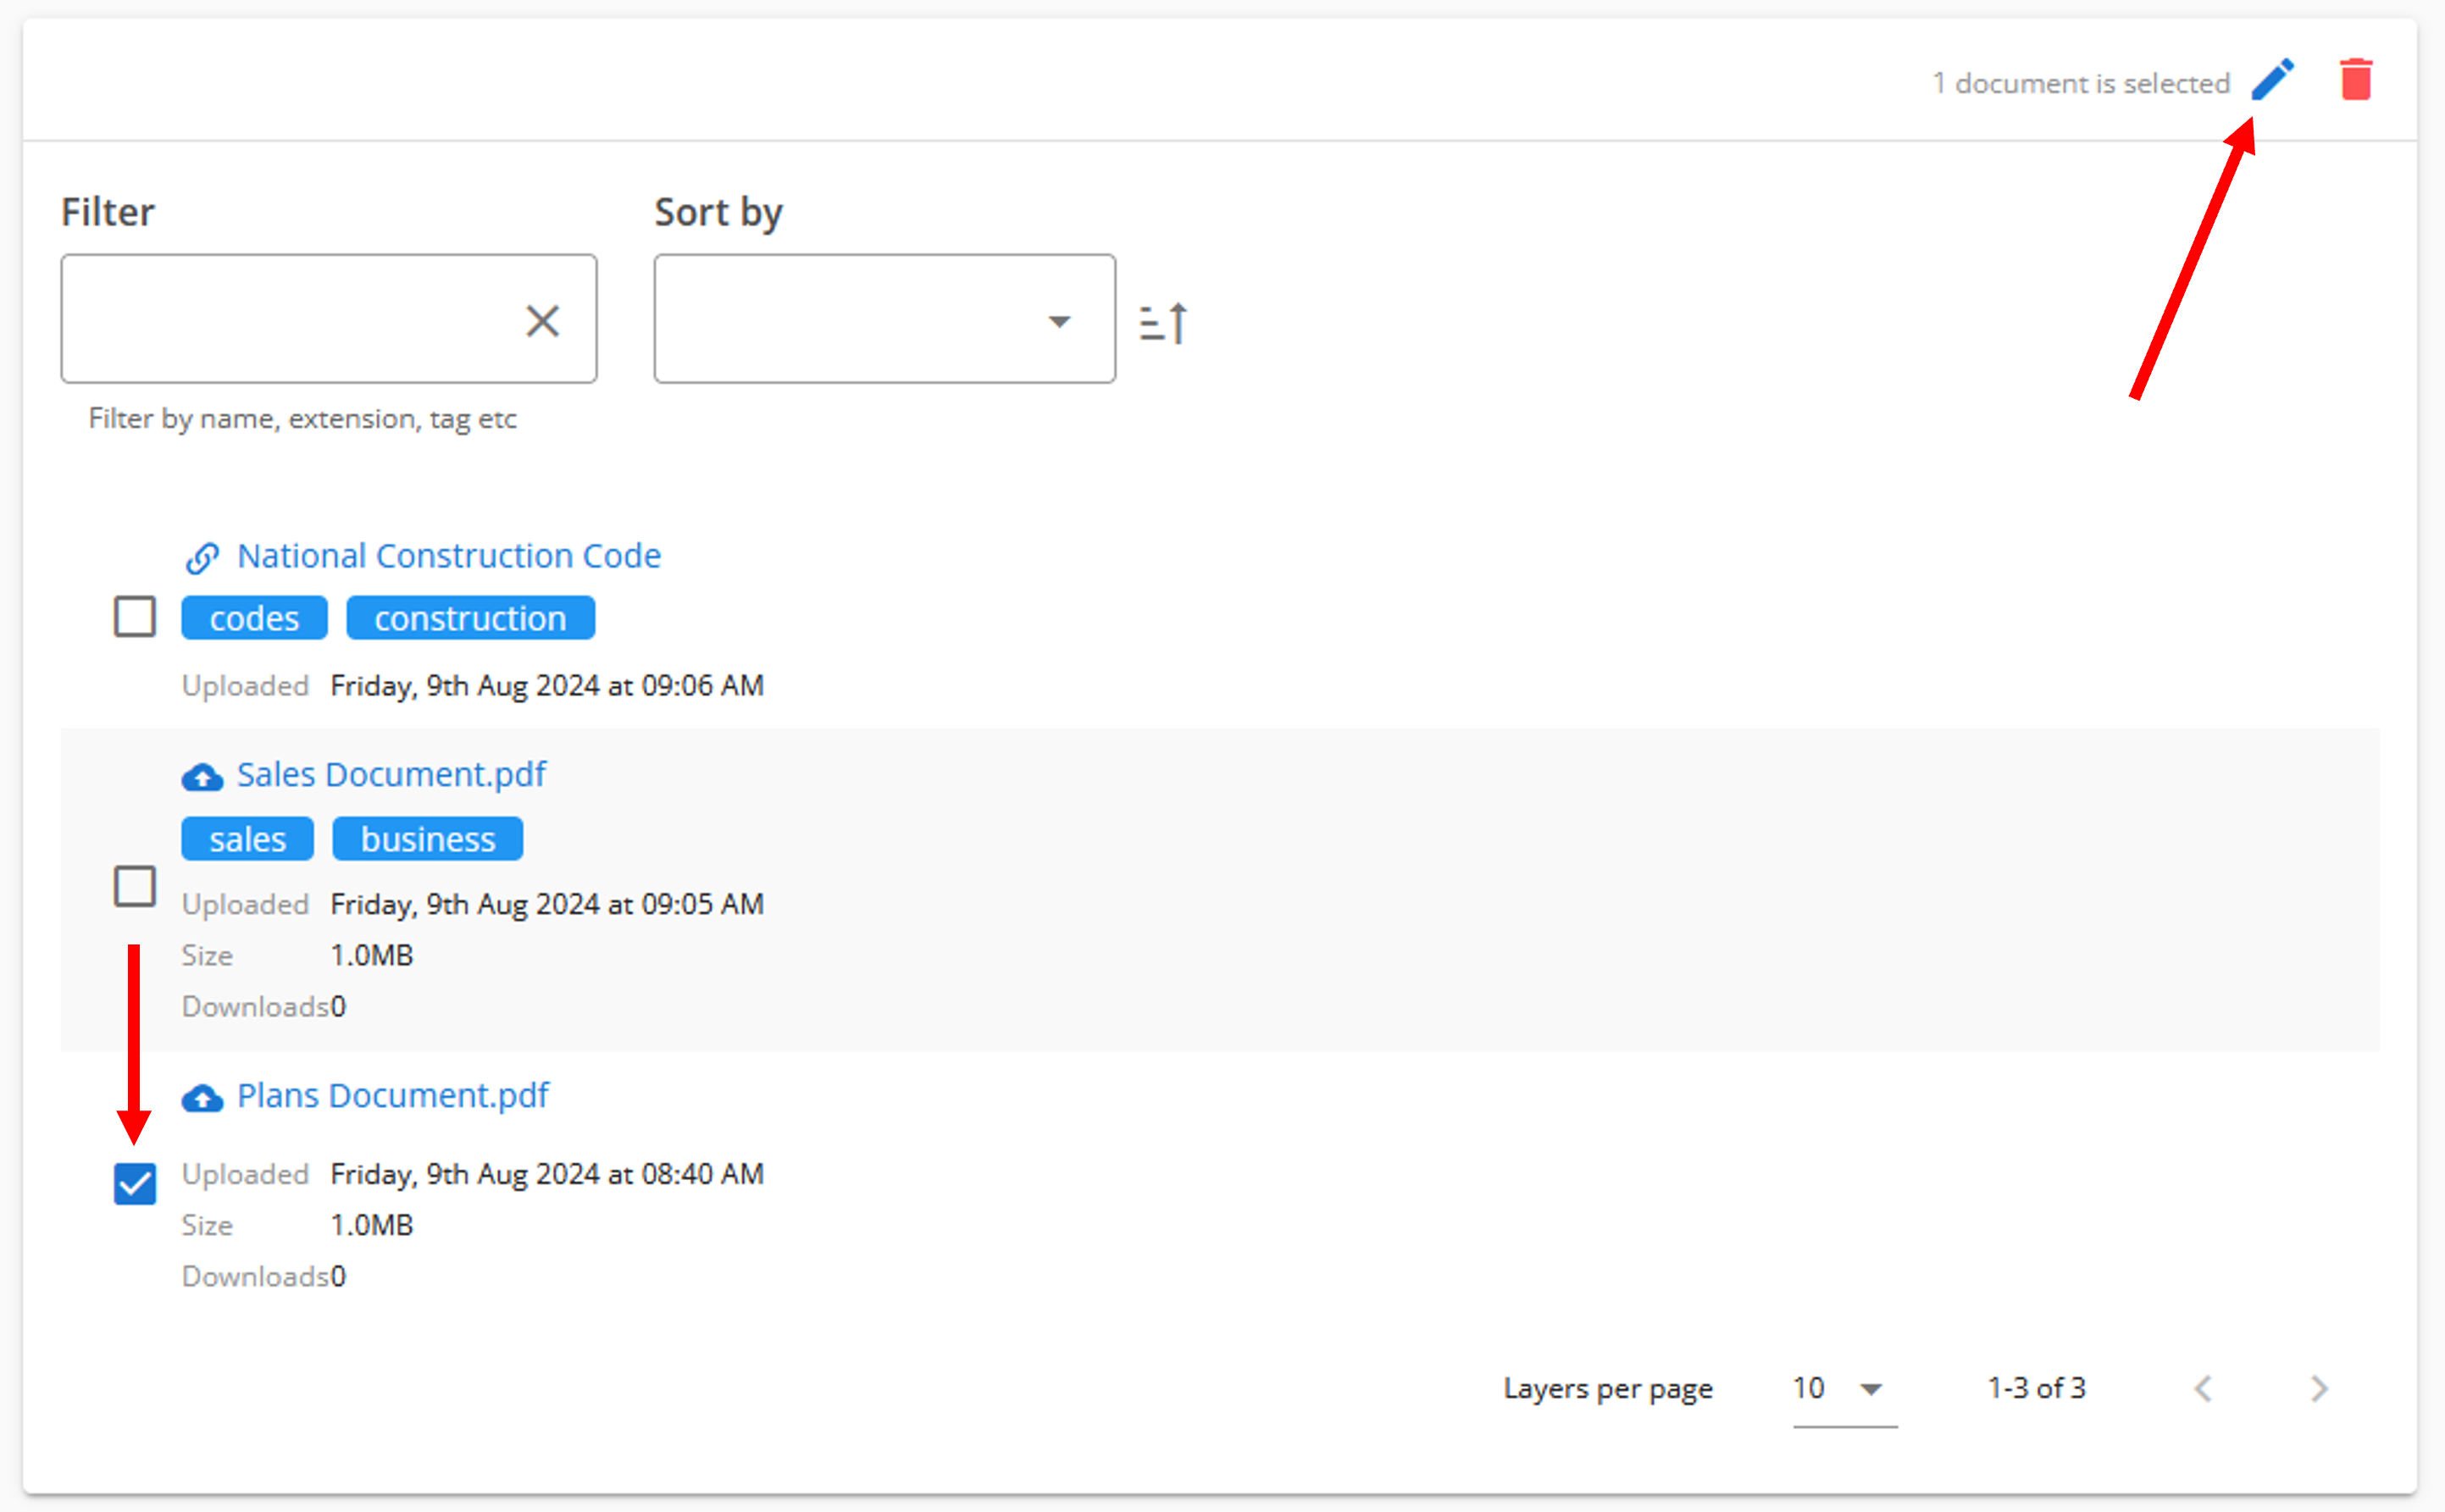
Click the edit icon shown above.
Filename, tags and layers can then be edited in the popup shown below.
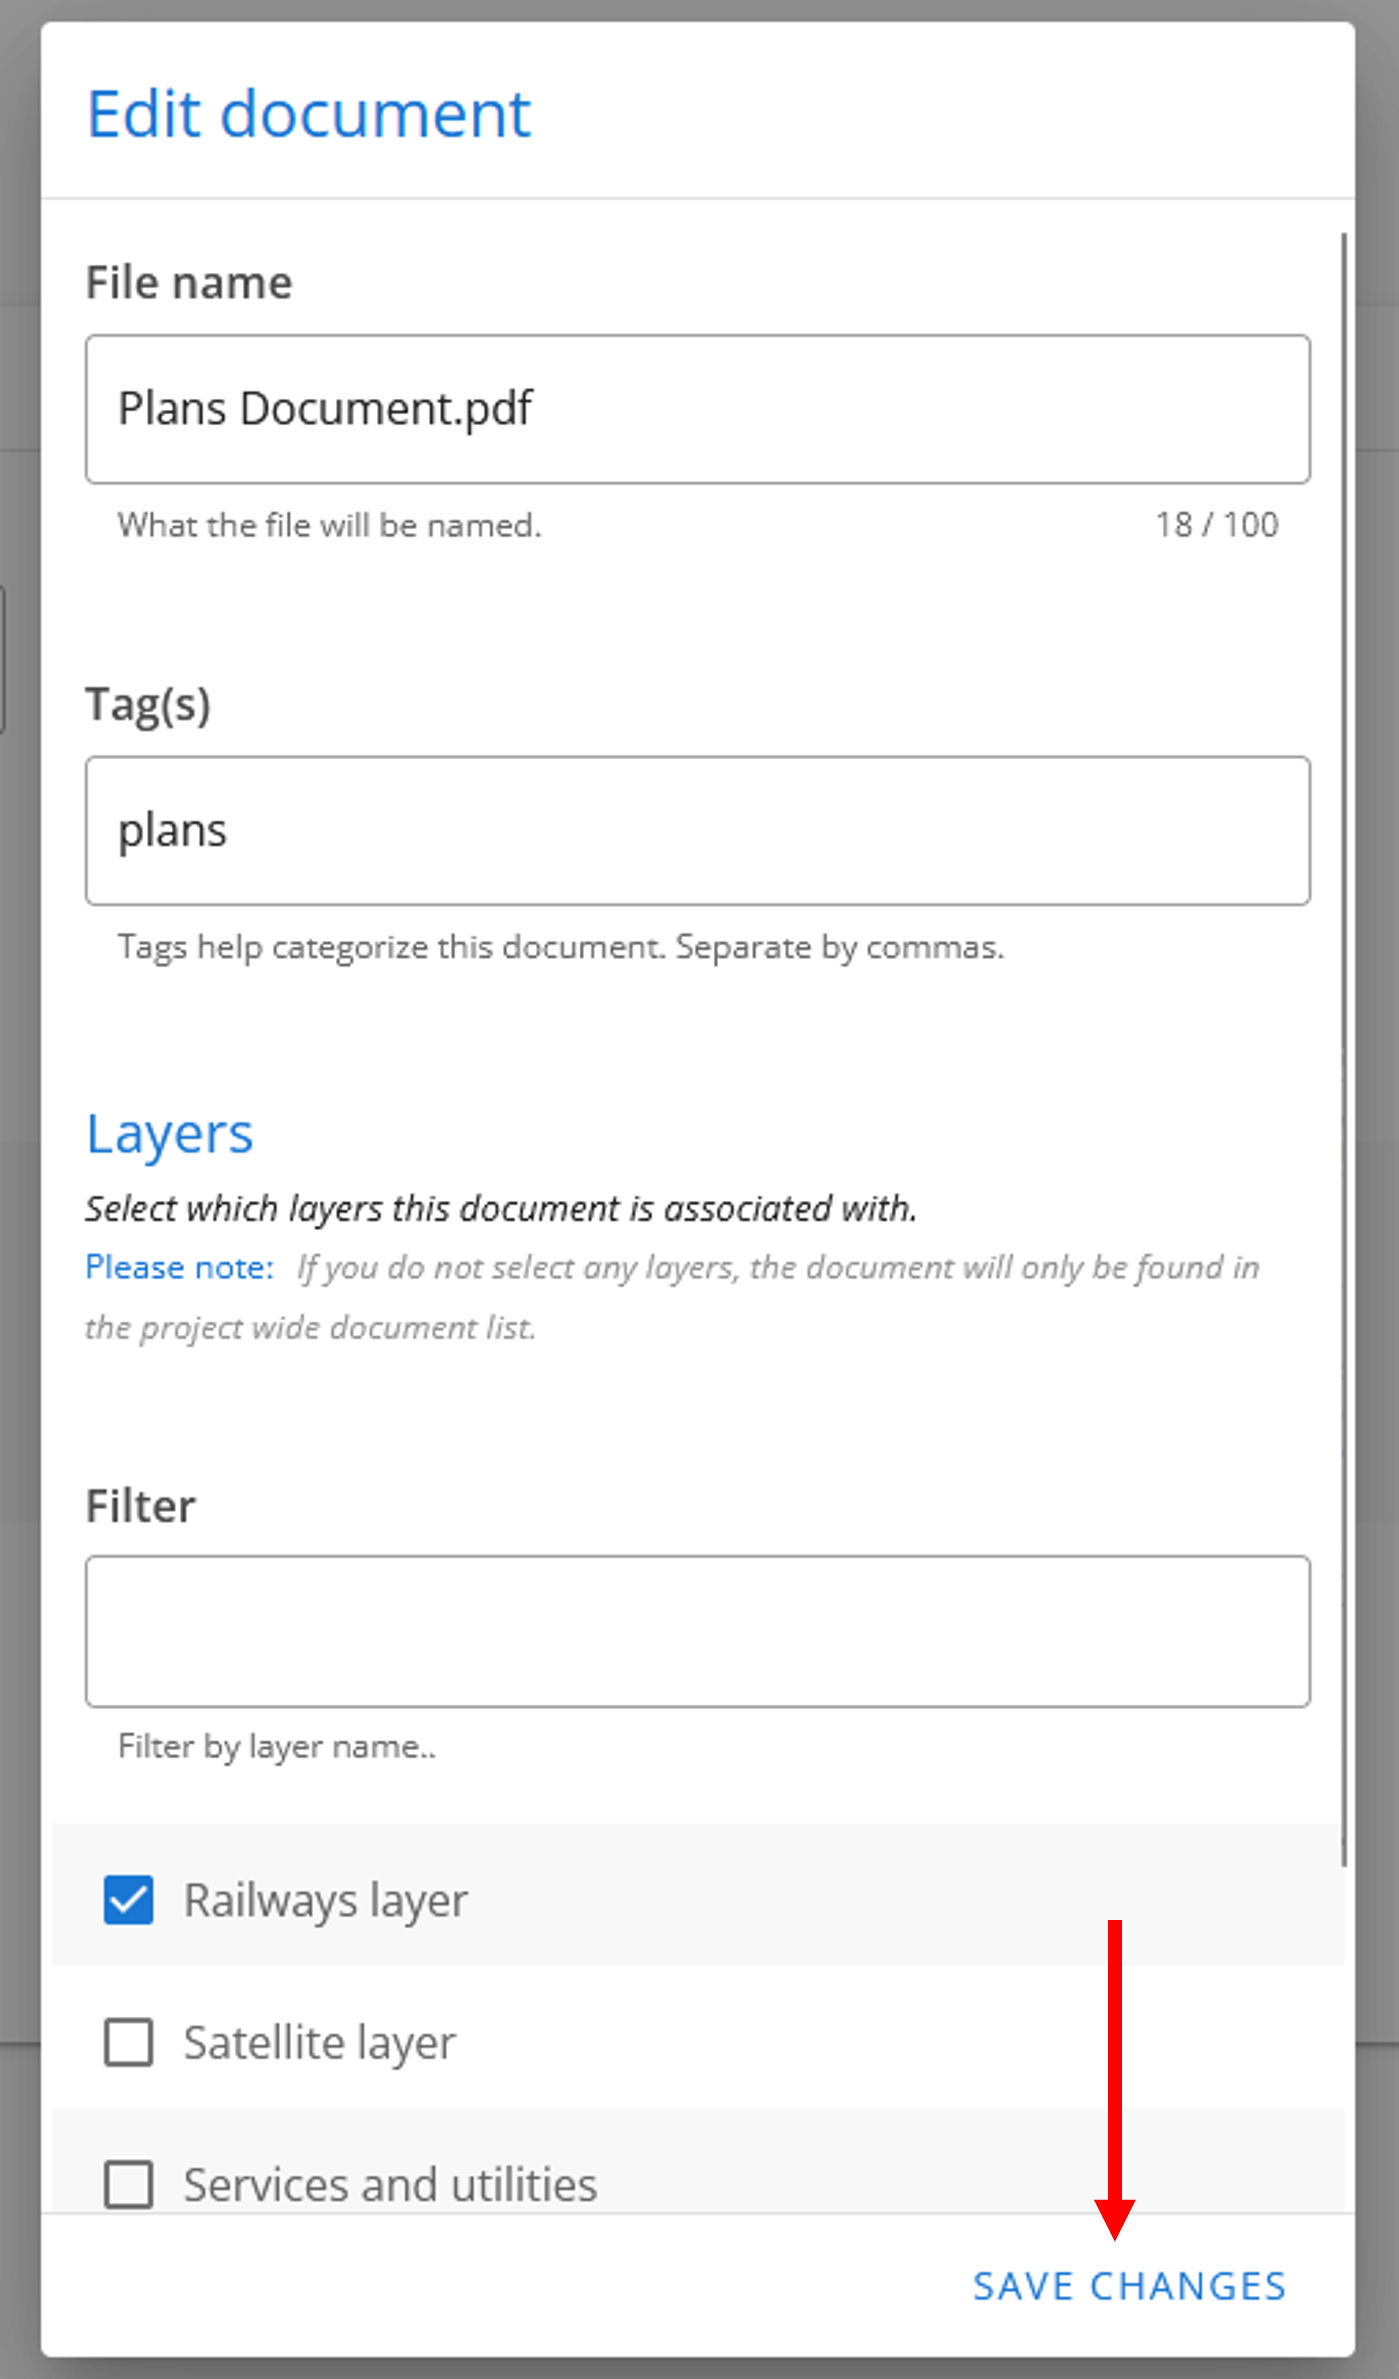
- Click Save changes as shown above.
# Delete documents
To delete documents, follow the steps below.
WARNING
Deleting a document cannot be undone and documents cannot be recovered after being deleted.
- Select the desired documents by clicking their checkboxes as shown below.
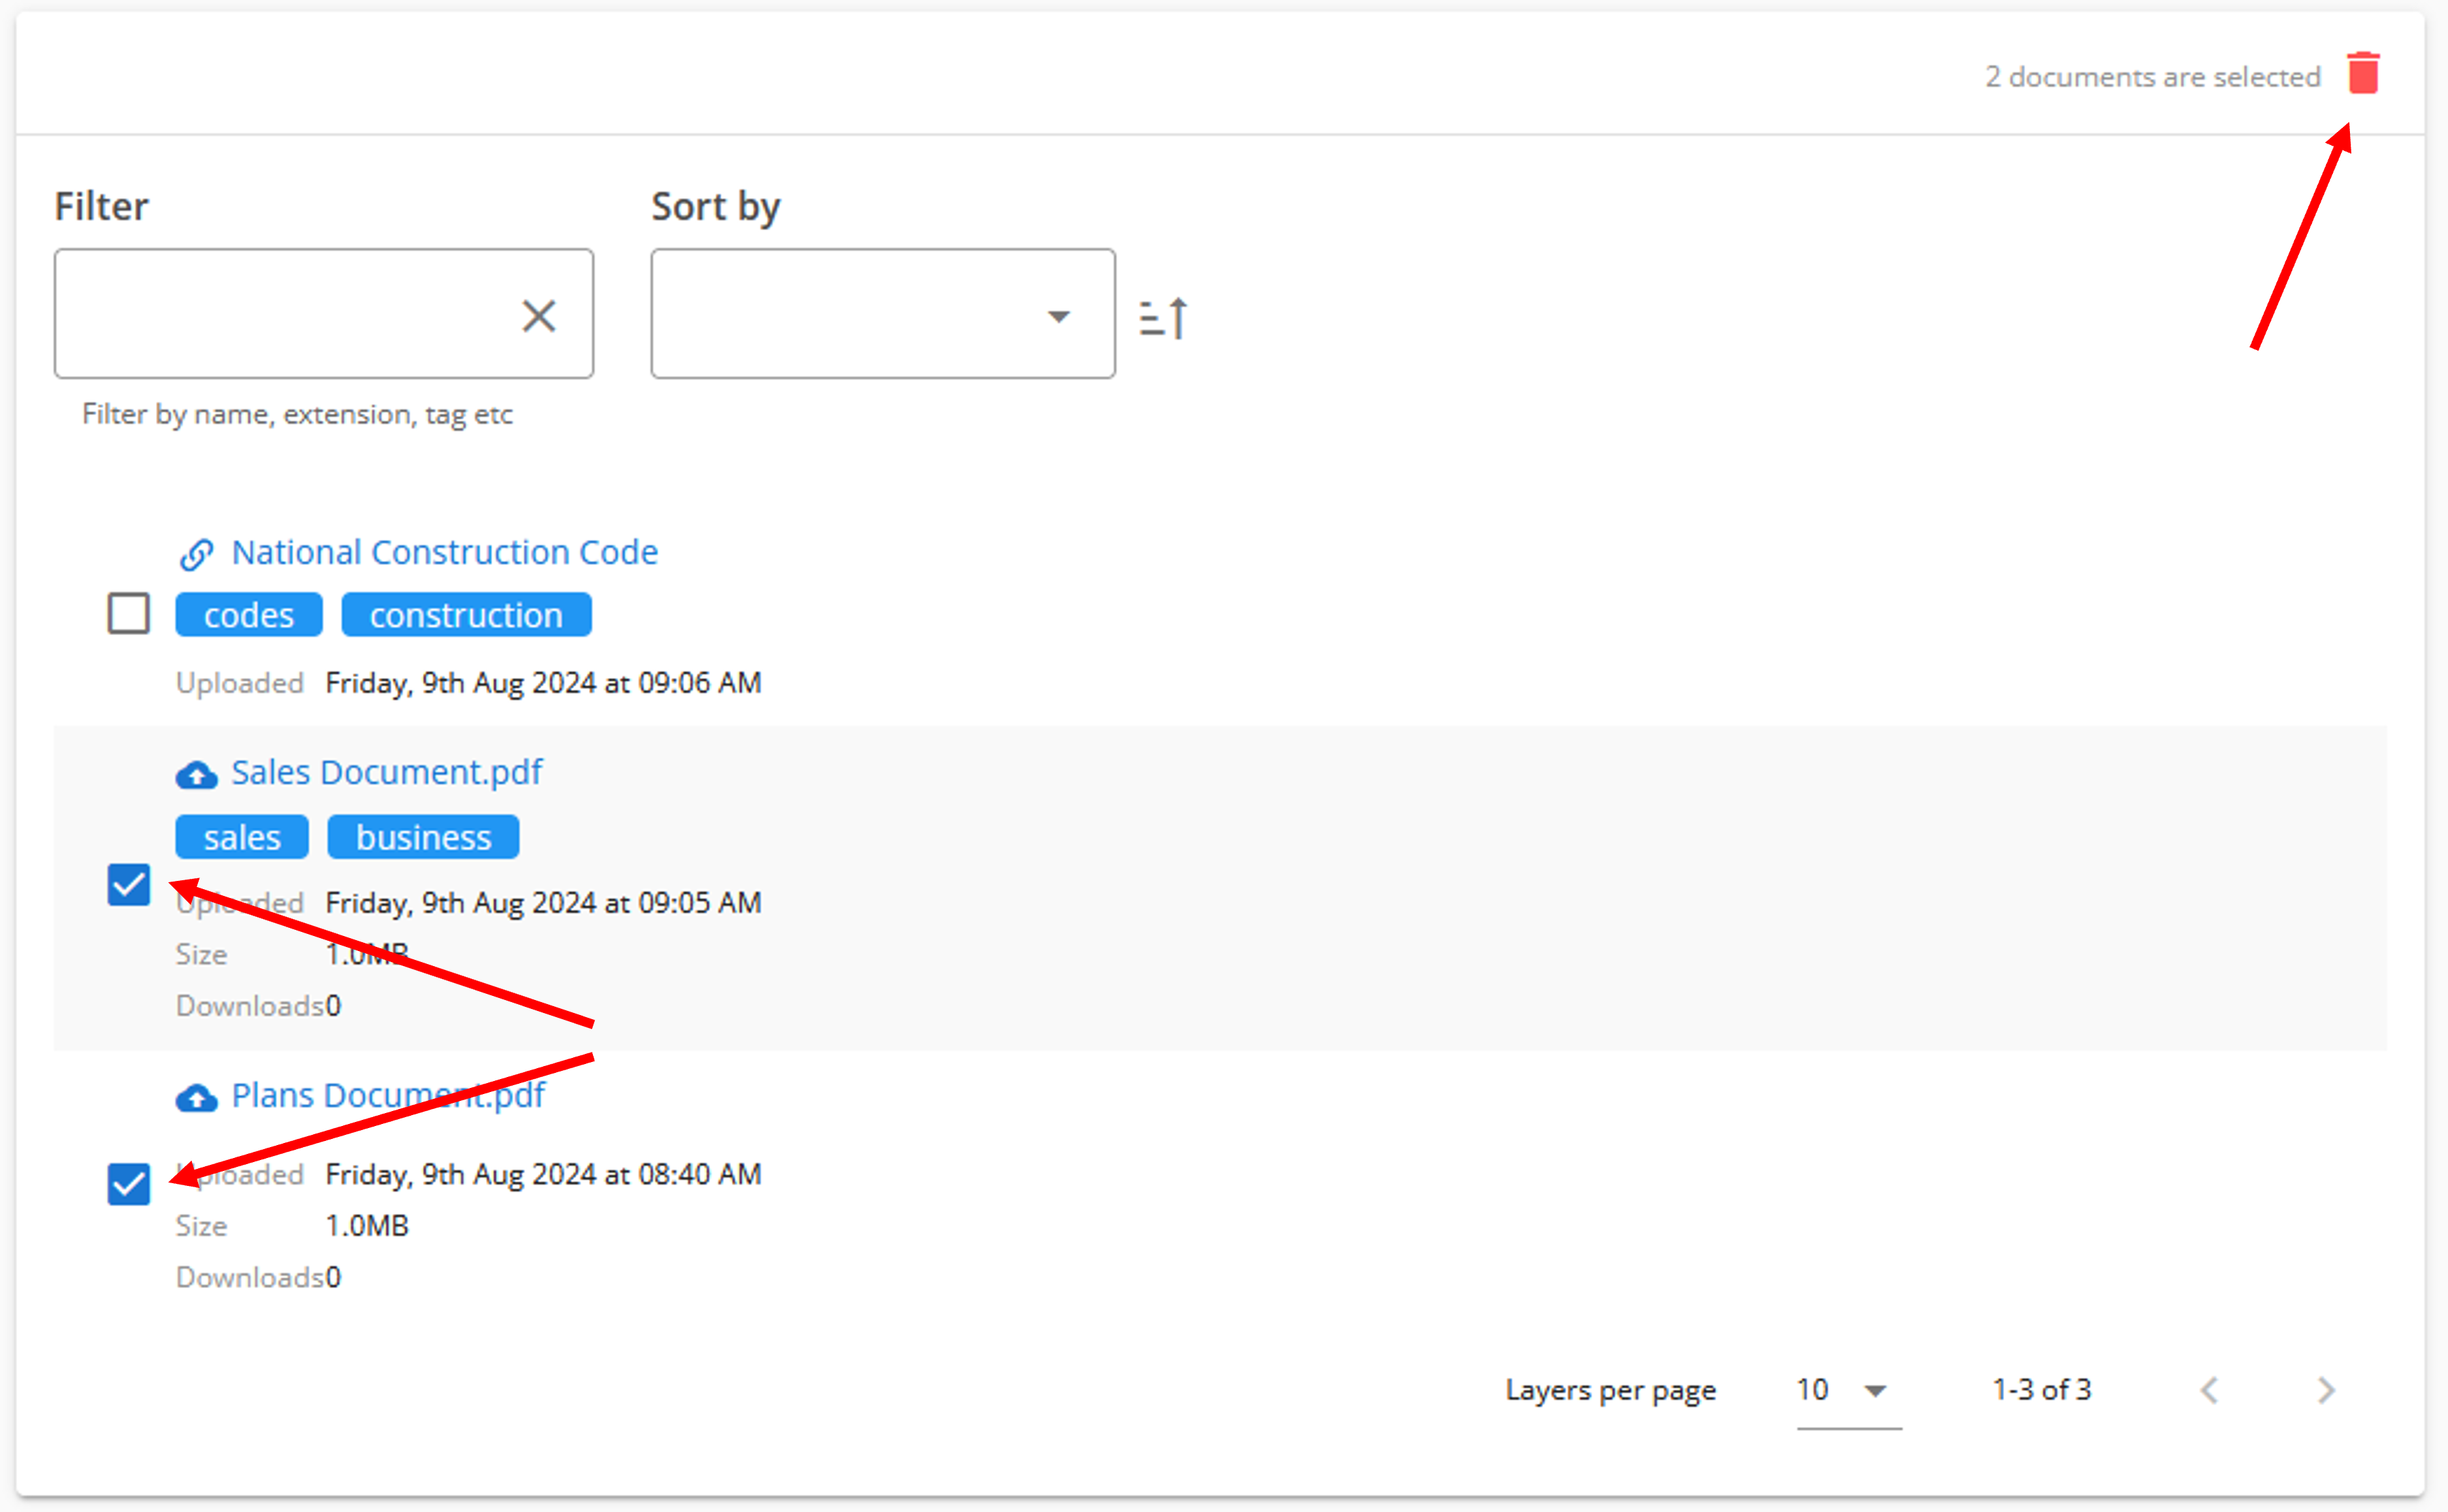
- Click the delete icon shown above then click Confirm in the popup.
