# Points of interest
For each of these tasks, open your project, click Administration from the navigation bar then click Points of interest in the left sidebar.
# Bulk upload points of interest
To bulk upload points of interest, follow the steps below.
TIP
Note that each photo in the zip file must be geo-tagged. A zip file containing photos without geo-tagging will be rejected.
Open your project, click Administration from the navigation bar then click Points of interest in the left sidebar.
Under Bulk upload, click Select and choose a zip file to upload.
Optionally assign tags to your uploaded points of interest by typing them in the "Tags" input and selecting them from the dropdown as shown below.
You may also specify a merge radius when uploading photos if you would like to merge photos near each other into a single point of interest. The smaller this value, the closer photos must be in order to be merged. If not specified, photos will only be merged if they are taken at the exact same location. The logic behind this process is detailed at the end of this article.
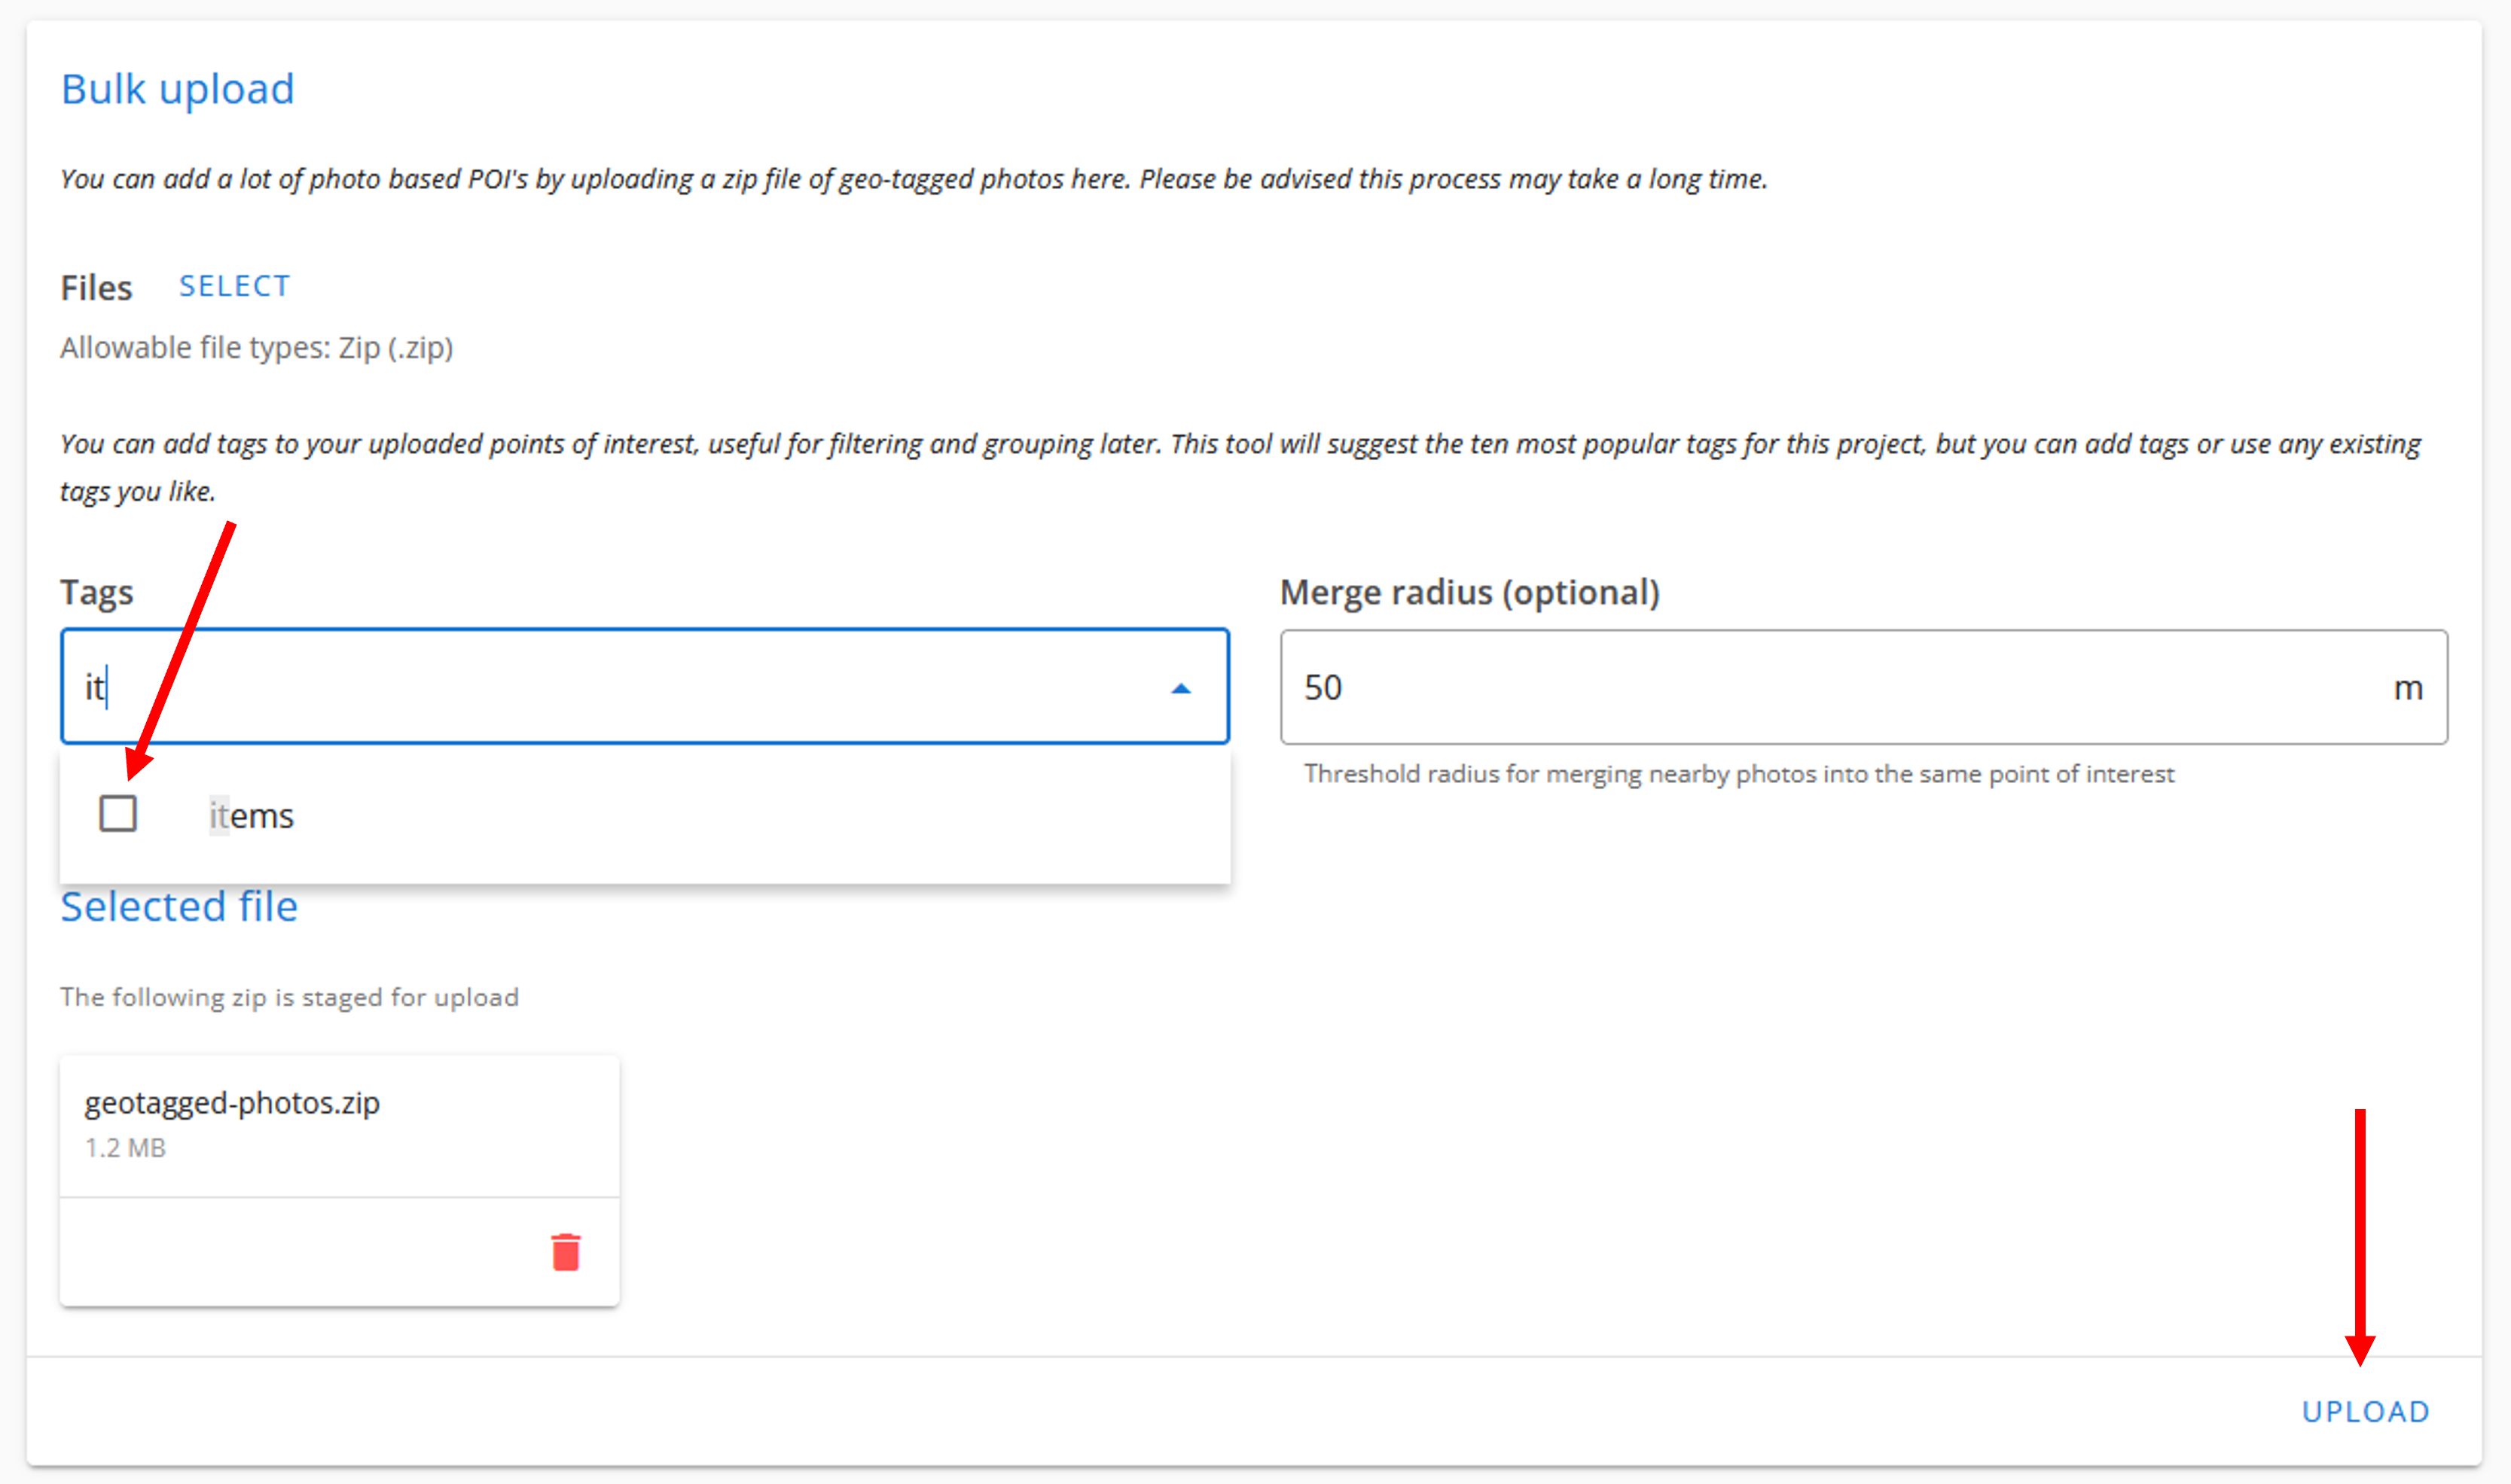
- Click the Upload button shown above.
# Bulk export points of interest
To bulk export points of interest, follow the steps below.
Under Export photos, click Export and wait for the zip file to be prepared.
Click the link of the prepared zip file as shown below.

# Logic for merging photos into points of interest
When a zip file containing a list of photos is uploaded with a specified merge radius R, Civillo performs the following:
- For each photo:
- If the photo is not already a member of a group then create a group and add this photo to it.
- If the photo has other nearby photos (i.e. within
R) then add them to this photo's group.
- For each group:
- Calculate the centre of the group.
- Remove from the group any photos not within
Rof the centre. - Add all photos in the group to the list of completed photos.
- Repeat steps 1 and 2 (ignoring already-completed photos) until all photos have been completed.
- For each group, create a point of interest including all associated photos.
If you are uploading several clusters of photos you would like merged, setting the merge radius to roughly the radius of the largest cluster will perform the appropriate merging, provided that the clusters themselves are sufficiently spaced apart.