# Linking data to another project
Typically, project data that exists within a Civillo project is isolated and accessible inside that project only.
Sometimes, you may wish to share data with project stakeholders without including them as users in your project. Or, you may have a larger overall project with many small sub projects for easier management and wish to share finalized data back to the larger project.
Civillo allows you to do this using Project links.
Note that project links are an opt-in feature and therefore may not be accessible for usage by default. Please contact Civillo support at support@civillo.com to request access to this functionality for your organization.
# Project links
Project links allow two projects to be be linked or "bound" to each other. Each link is a one way binding (although links can be created both directions) allowing project administrators in one project (source project) to create layers in the project it is linked to (destination project).
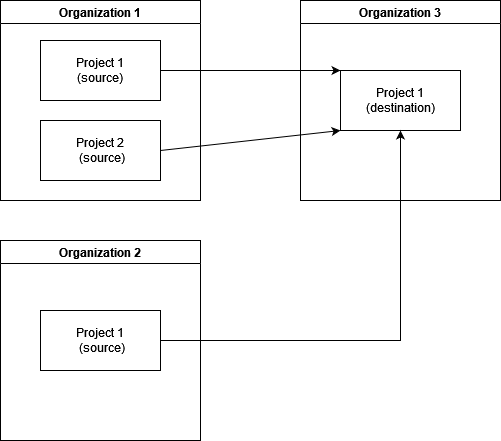
Projects are limited to being linked to only one other project. See Figure 1 which shows how multiple projects across multiple different organizations can be linked to a single project in a third organization, allowing data from multiple projects to be shared to one (or multiple) destination projects.
TIP
There is no limit to how many projects you can link with. Any number of combinations between projects can be created to fit the requirements.
# Creating a project link
Before another project can share data with your project via a project link, an invitation to link needs to be created.
# Creating a project link invitation
Project link invitations are tokens which you can share with administrators of other projects, that they can use to create a one way link from their project to your project.
As this binding is one way, the project that creates the invitation (destination) is allowing the project that consumes the invitation (source) to remotely share their layers into the inviting (destination) project. To share layers in reverse, a second link needs to be created, invited by the other (source) project.
To create a project link invitation, navigate to the Project links page via
Administration -> Project -> Project links
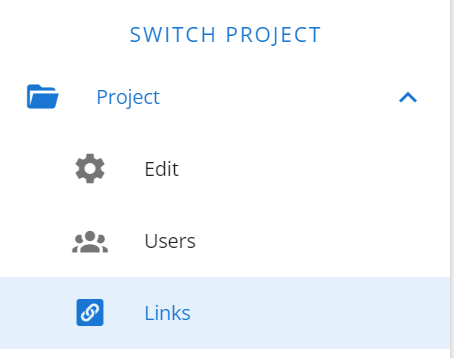
At the top right of the Invitations table, click the Create button to open the invitation creation form.
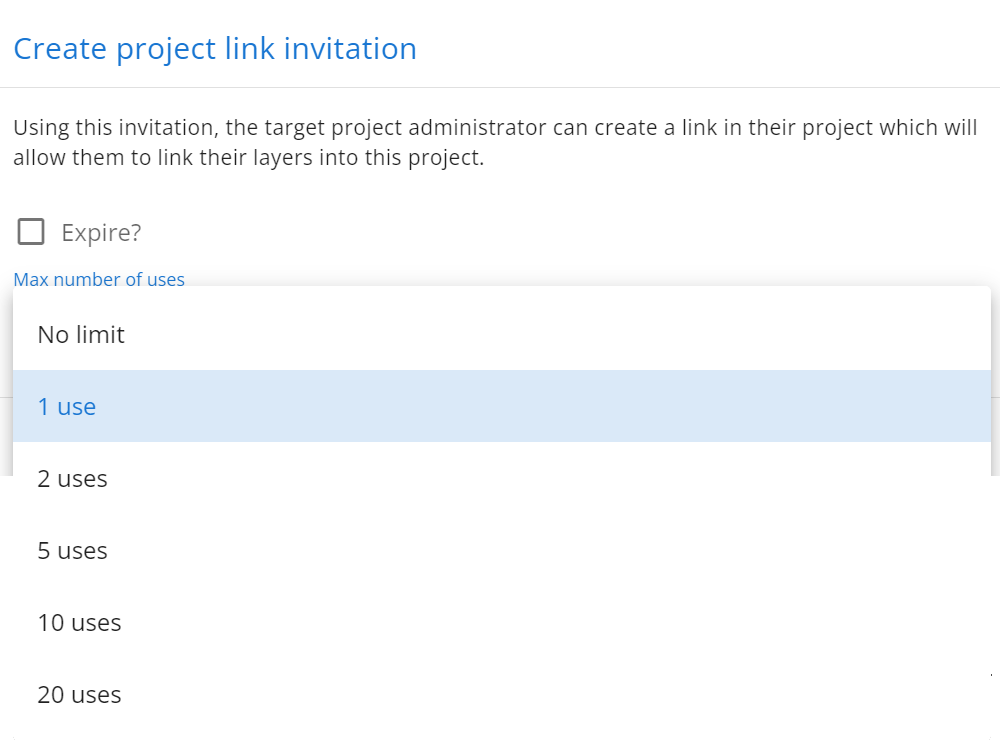
By default, invitations are set to not expire and are only allowed to be used once, however you can set them to expire or increase the maximum number of uses, even make them unlimited use.
TIP
A project-link "use" is the number of times the token can be shared between projects.
Once an invitation has past its expiry (if set), or has reached the maximum number of uses, it will no longer be valid and no more project links can be created from it.
When a project link invitation is created, a code will be displayed which needs to be shared with an administrator of the project you wish to allow data to be shared to you from.
You can delete existing invitations by selecting the checkbox of that specific invitation in the table, then clicking the Delete button in the footer of the table.
Any links created from the invitation will remain, however no new links will be able to be created from the deleted invitation code.
# Using an invitation code to create a project link
Once you have been provided an invitation code by an administrator of another (destination) project, you can create a project link between the two projects.
To consume the project link invitation code, navigate to the Project links page via
Administration -> Project -> Project links
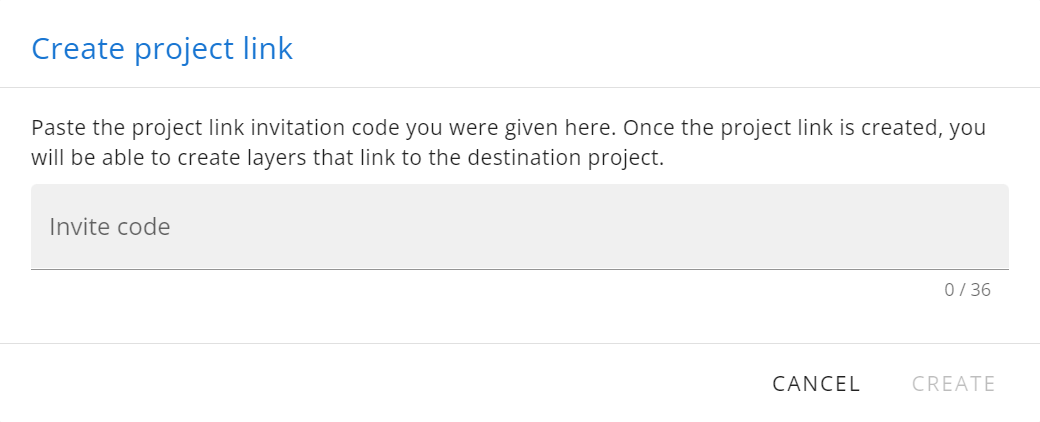
At the top right of the Active links table, click the Create button to open the project link creation form.
Paste the invite code into the Invite code field, then click Create to create the project link. If the invite code was valid, the project link will be created and appear in the Active links table, showing the binding direction (up arrow meaning outgoing, your project is the source and down arrow meaning incoming, your project is the destination), the organization and project name that you are linked to.
Once the project link is active, the source project can begin sharing layers with the destination project when creating or editing layers.
# Sharing a layer via project link
If your project is the source project in a project link, you can share most layers with the destination project. The only layers that are not currently supported in project links are Online imagery and Terrain layers.
When a layer is shared with a destination project, the layer is replicated in the destination project. Any property changes, customizations, overrides and permissions that the administrators make against the layer in the destination project will only affect the layer in the destination project.
# Sharing a layer at layer creation
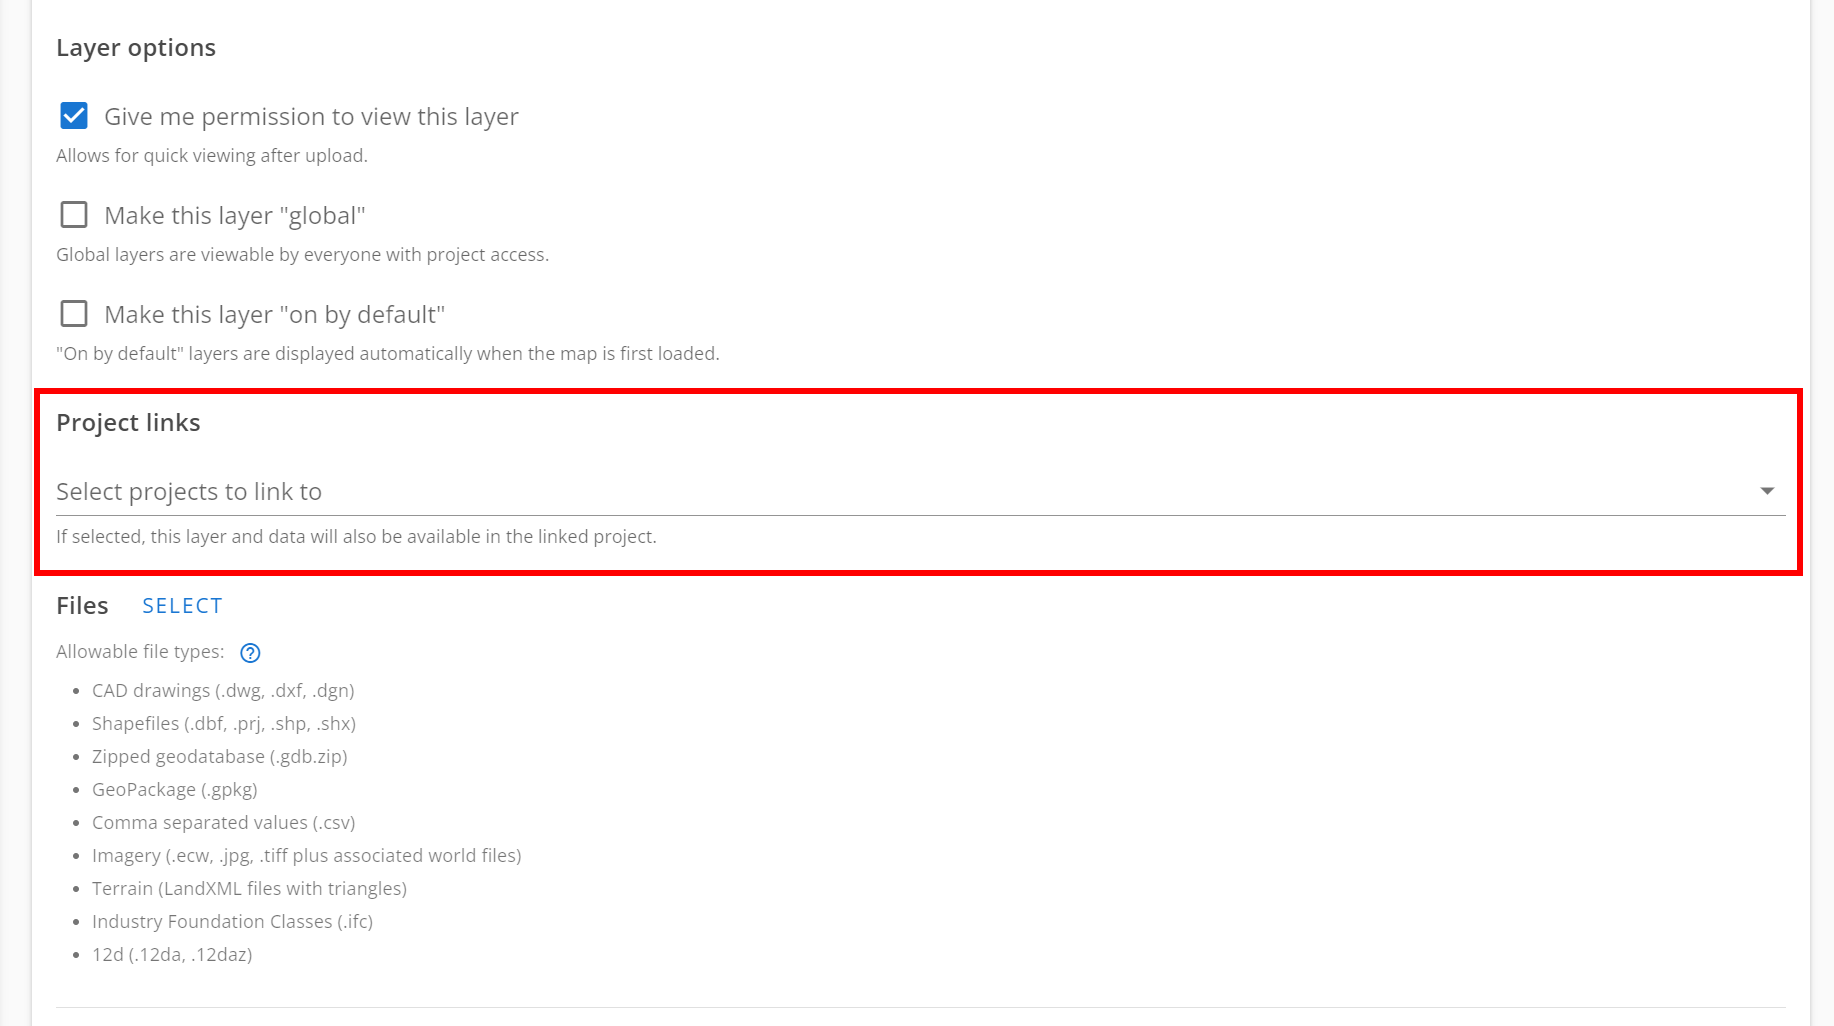
When creating a new layer (when filling out the parameters of the layer you are creating) select the projects you wish to link the layer to in the Project links select field. You can select as many project links as you like to share with. Only projects you are linked to, in which your project is the source project, will appear in the list of available projects.
When the layer is created, the layer will be replicated in each of the projects you selected to share with.
# Sharing an existing layer
To share an existing layer, navigate to the Layers edit page via
Administration -> Layers -> Edit
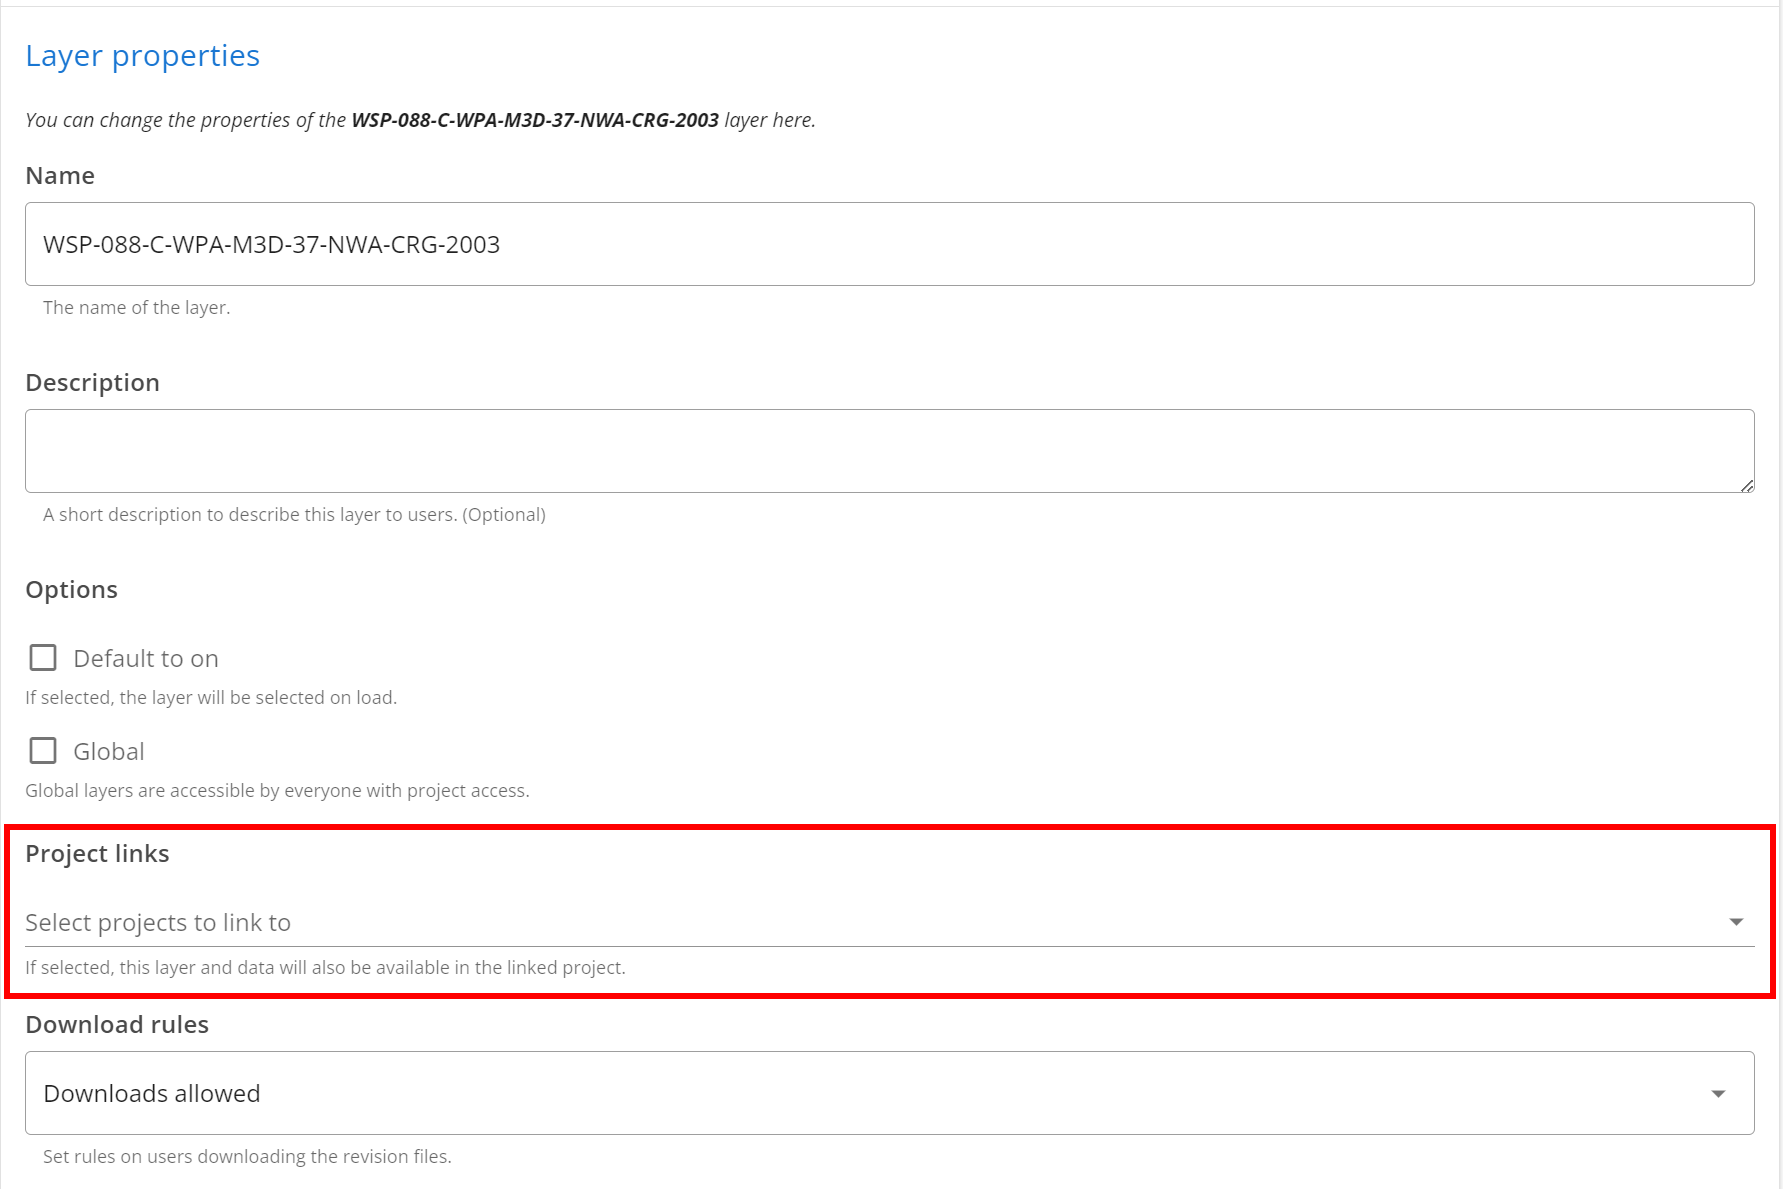
Select the layer you wish to share in the select field, then under layer properties select the projects you wish to link the layer to in the Project links select field. You can select as many project links as you like to share with. Only projects you are linked to, in which your project is the source project, will appear in the list of available projects. Click Save changes to confirm sharing the layer.
When the layer is shared, the layer will be replicated in each of the projects you selected to share with.
# Managing a layer shared to your project
If your project is the destination project of a project link, the source project can share layers directly into your project. Any layers shared from the source project will arrive in your project unassigned to any directory, have no permissions set (permissions are not inherited) and will have the same name the layer had when shared from the source project.
You can go ahead and change the name to suit your organization, assign it to whatever directory you wish, assign permissions to users or groups or globalize it how you like. All these customizations only exist against the layer in your project and do not affect the layer in the source project.
If you delete the layer, you can only get access to it again if the source project shares it again.
# Stop sharing a layer
In some cases, you may wish to stop sharing a layer that was previously shared with a destination project.
To stop sharing a previously shared layer, navigate to the Layers edit page via
Administration -> Layers -> Edit
Select the layer you wish to stop sharing in the select field, then under layer properties unselect the projects you wish to stop sharing the layer to in the Project links select field. Click Save changes to confirm sharing changes.
When you stop sharing a layer with a destination project, the layer will cease to exist in the destination project. This will also remove any customizations, assignments or permissions that the administrators of the destination project made to the layer on their side, so use this functionality wisely, as to undo it, you will need to reshare the layer.
# Deleting a layer that is shared with another project
If you delete the layer in the source project, the layer will also be deleted from the destination project, so be mindful in case the destination project requires the layer to persist for some reason.
# Deactivate a project link
In the event you wish to disable any more layers from being shared across a project link, a link can be temporarily deactivated. When a project link is inactive, existing shared layers will remain, however no new layers can be shared until the link is reactivated.
To deactivate an existing project link, navigate to the Project links page via
Administration -> Project -> Project links
In the Active links table, under Actions, click the Deactivate link button next to the link you wish to deactivate. Once deactivated, the project link will be moved to the Inactive links table. From here, the link reactivated, deleted or left to remain inactive.
# Reactivate a project link
If you wish to reactivate an inactive project link and allow layer sharing once more, navigate to the Project links page via
Administration -> Project -> Project links
In the Inactive links table, under Actions, click the Reactivate link button next to the link you wish to reactivate. Once reactivated, the project link will be moved to the Active links table.
# Delete a project link
If you wish to delete a project link and ties to the other project (either source or destination), navigate to the Project links page via
Administration -> Project -> Project links
Before you can delete a project link, it must first be Inactive. In the Inactive links table, under Actions, click the Delete link button next to the link you wish to delete. Once deleted, the project link will cease to exist and any layers that were created as part of the project link will be removed from the destination project and no longer be accessible in the destination project. This will also remove any customizations, assignments or permissions that the administrators of the destination project made to any layer created from the project link on their side, so use this functionality wisely, as to undo it, you will need to recreate the link and reshare the layers.