# Chainage alignments
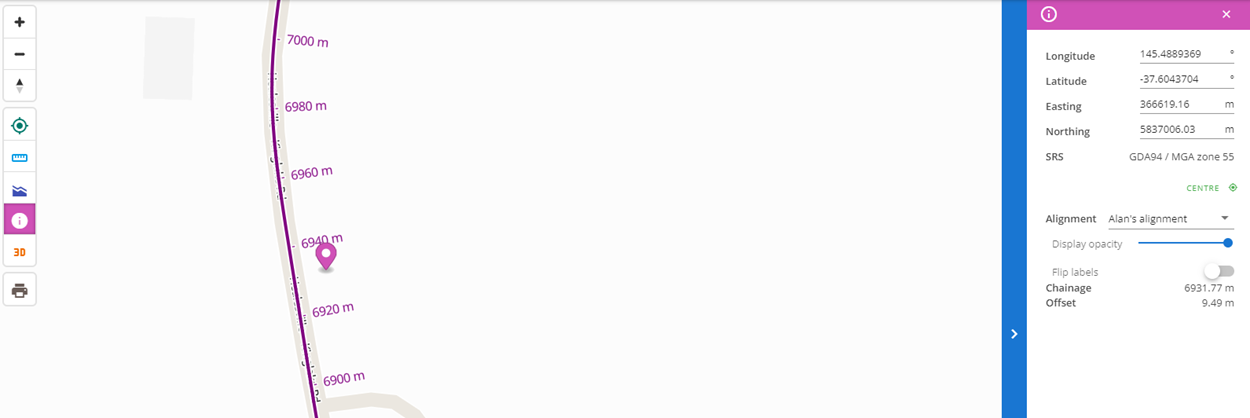
Civillo supports ‘smart’ chainage alignments that allow users to identify chainage and offset from an uploaded alignment by using the Info Tool.
# Uploading a chainage alignment
- To upload a chainage alignment, you will firstly need to export the alignment as a LandXML file in the same spatial reference system (SRS) as your project. Please note: Only one alignment per LandXML file can be uploaded to Civillo at a time. Multiple alignments can be uploaded to the same project by uploading multiple LandXML files.
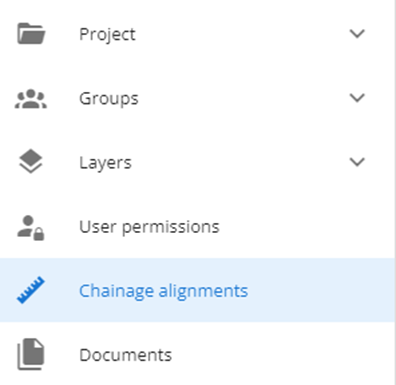
- From the Administration section of your project, select Chainage alignments from the left sidebar (Figure 2).
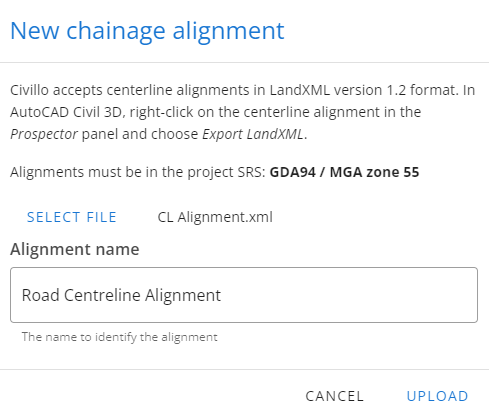
- Click + New alignment (Figure 3), then Select file. Choose your LandXML file. Finally, give your alignment a name and click Upload (Figure 4).

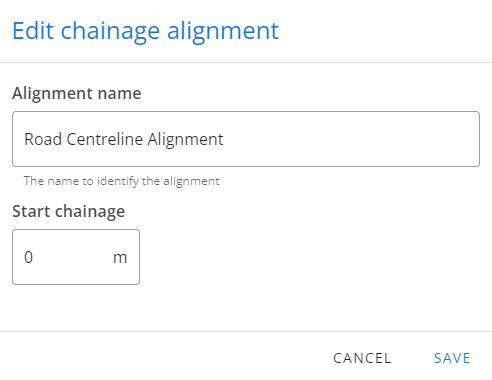
- Once the alignment has been uploaded, you can edit the value of the start chainage, if required, by clicking on the pencil icon (Figure 5).
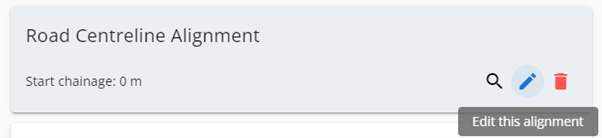
- You can use the magnifying glass icon to zoom to the selected alignment in the viewing window to the right. This is useful to determine if the selected alignment has the correct SRS. Alignments can be deleted by clicking the red trash can icon.
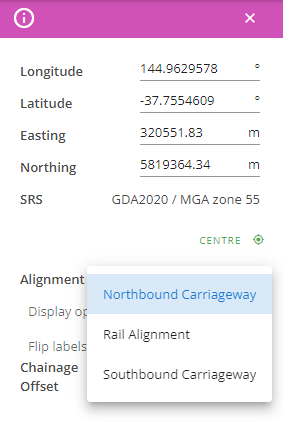
- To start using your new alignment, return to the map screen, click the Info Tool icon and select the desired chainage alignment from the Alignment dropdown on the Info panel (Figure 7).