# Use map layers
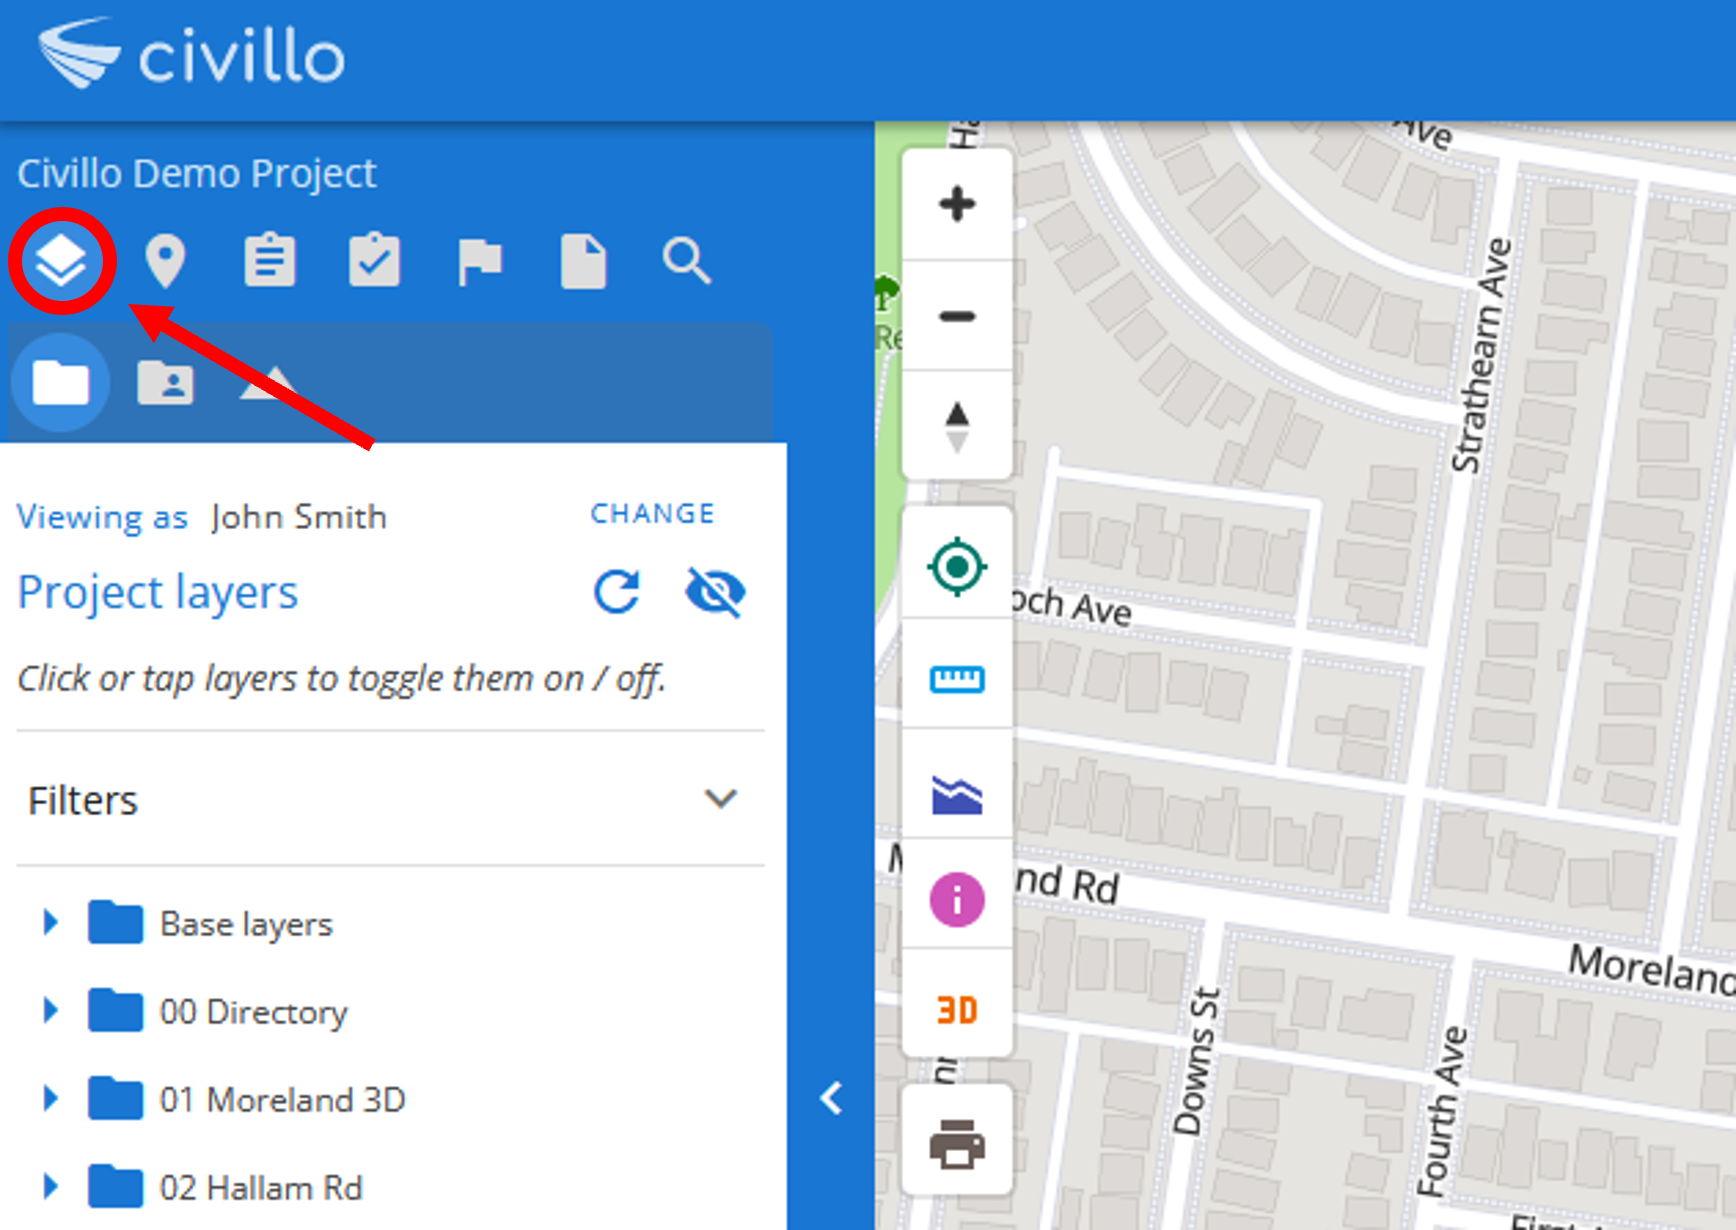
To navigate layers, open the side bar and click on the ![]() Icon.
Icon.
# The default map - Base layers
Civillo maps contain base map layers that are on by default. These are Mapbox (opens new window) streets and road names. If you do not want to view these layers, deselect them by clicking them, which will change the colour of the layer name from blue to grey.
To change the opacity of the layers, click on the ![]() icon then move the circle along the bar to select the desired opacity, ranging from 0 (invisible) to 100% (opaque).
icon then move the circle along the bar to select the desired opacity, ranging from 0 (invisible) to 100% (opaque).
# Selecting and deselecting layers
To select a layer to view on the map screen, firstly navigate to the location of your layer within the layer directory structure.
To view the layer, select it by clicking on it. The layer name will now appear blue. To deselect the layer, click on it again and the layer name will return to grey.
# Zoom to layer
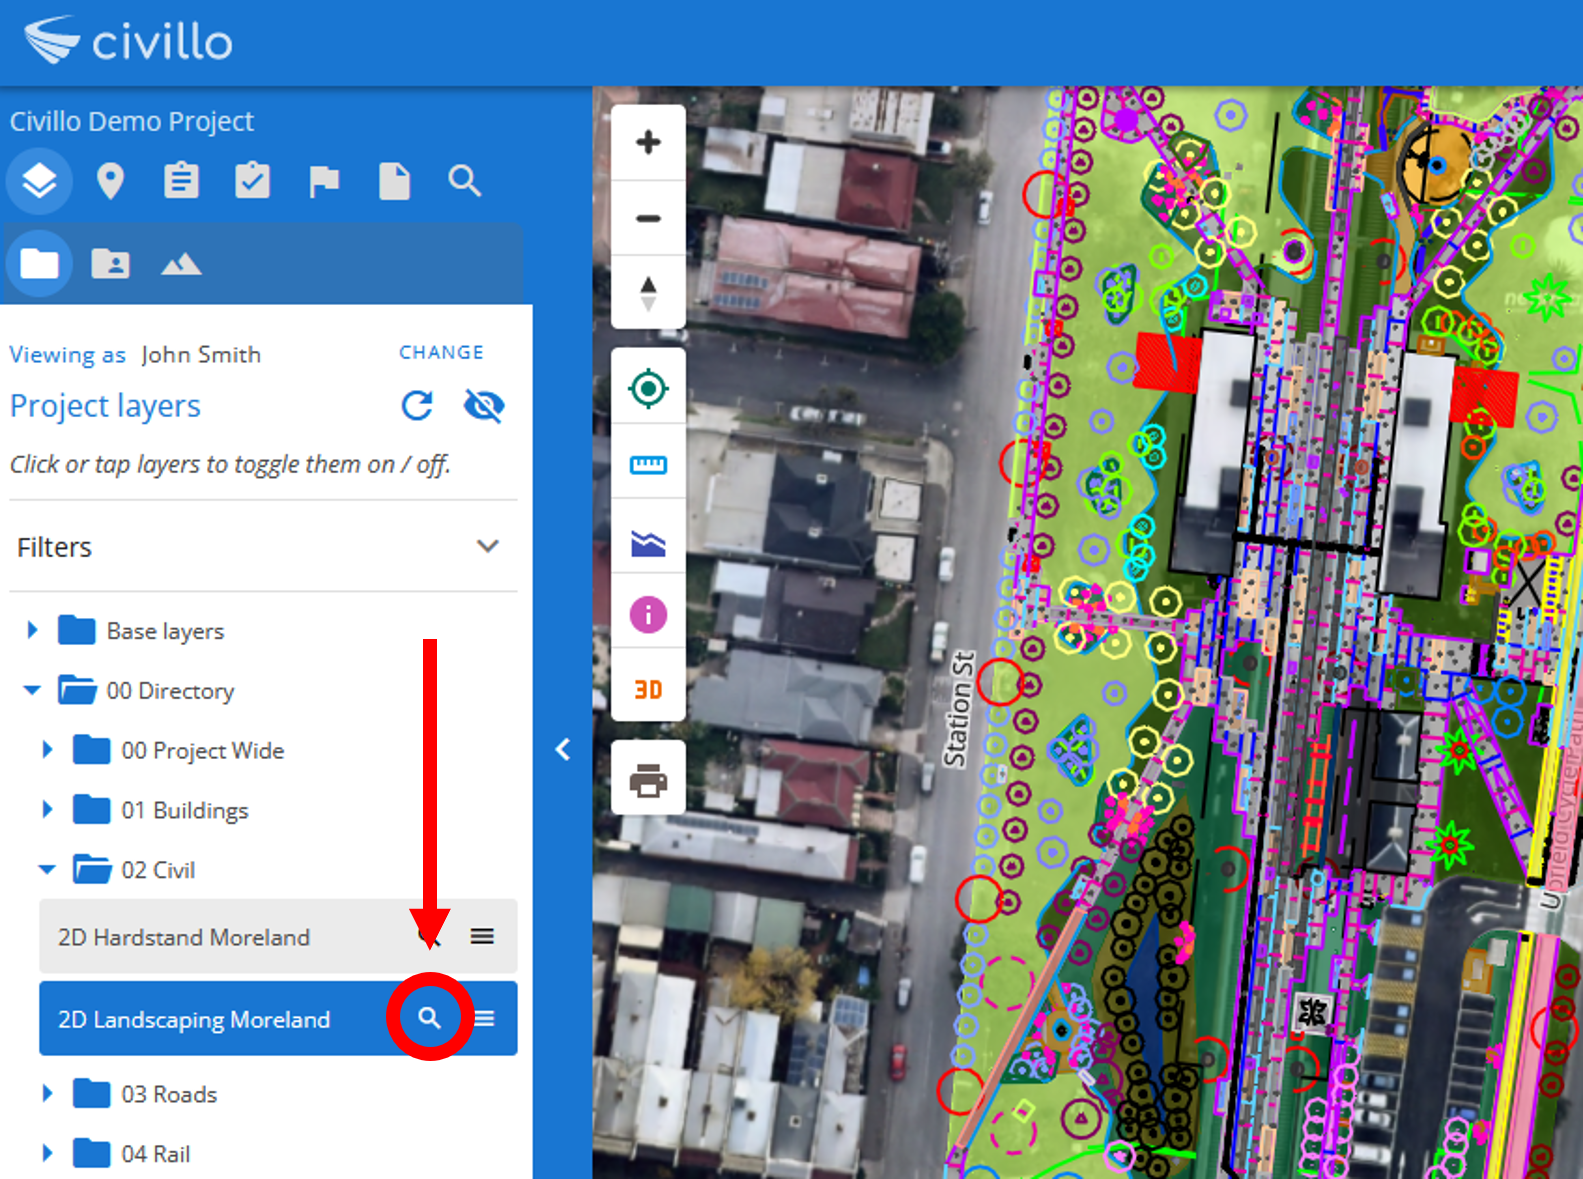
To zoom to the target layer, click on the ![]() . The selected layer will now be visible on the map.
. The selected layer will now be visible on the map.
# Layer details
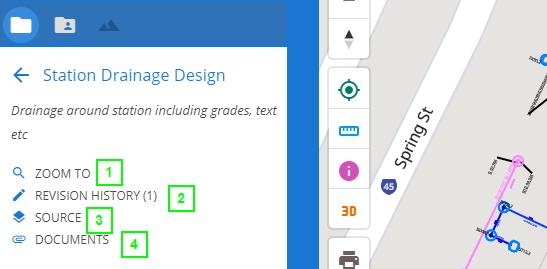
By clicking on the ![]() icon next to the layer name, the layer's metadata panel will be shown. Here you can zoom to the layer (1), see the revision history (1) of that layer, download the source data (3), and view any documents that have been uploaded related to the layer (4).
icon next to the layer name, the layer's metadata panel will be shown. Here you can zoom to the layer (1), see the revision history (1) of that layer, download the source data (3), and view any documents that have been uploaded related to the layer (4).
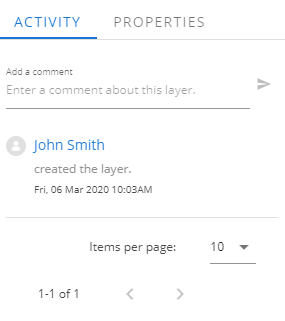
The layer details also shows an activity log for the layer with information about who did what and when, along with any comments that were made by users. You can also make your own comments on the layer here.
# Layer properties
Also on the layer's metadata panel is the Properties tab.
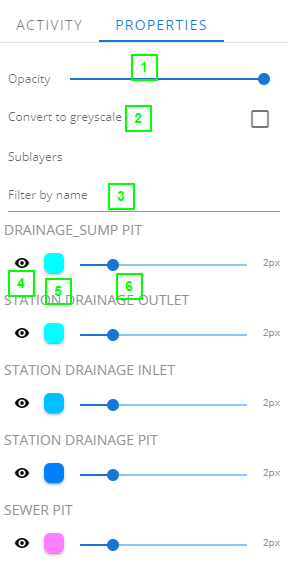
To change the opacity of your layer, on the slider marked opacity (1) move the circle along the bar to select the desired opacity, ranging from 0% (invisible) to 100% (completely opaque).
To convert the layer to greyscale, check the checkbox marked greyscale (2).
# Sublayer overrides
You can change the look of different sublayers in the layer by changing the overrides for a particular sublayer. You can browse sublayers or navigate directly to the sublayer if you know the name using the filter (3). You can change the following properties.
- Visibility (4) - Turn the sublayer on or off.
- Colour (5) - Change the colour of the sublayer.
- Stroke width (6) - Change the stroke width of the sublayer. The default stroke width is 2 pixels.
After making changes to the layer, you can reset the style of the layer to default by clicking the reset to default button.
TIP
Any sublayer overrides you make only affect the current map session. Once you refresh your page, they are lost. Also, other users do not see any changes you make, they only affect you.