# Use the Terrain / Cross-sections
Many civil engineering related works need to review longitudinal and cross-sections using existing infrastructure and terrain.
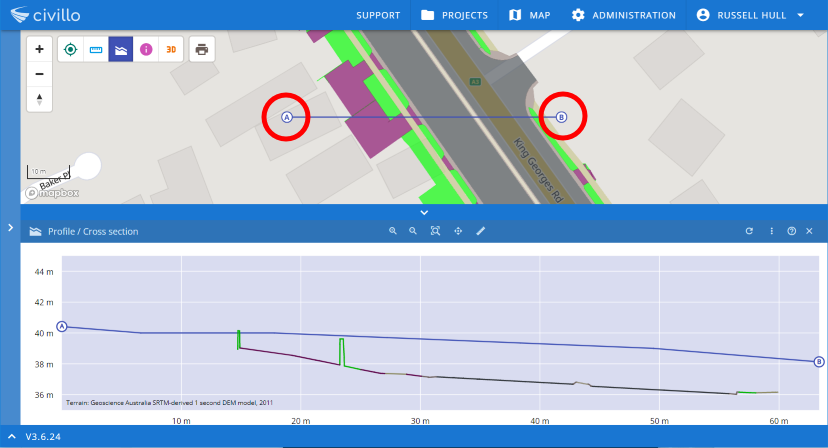
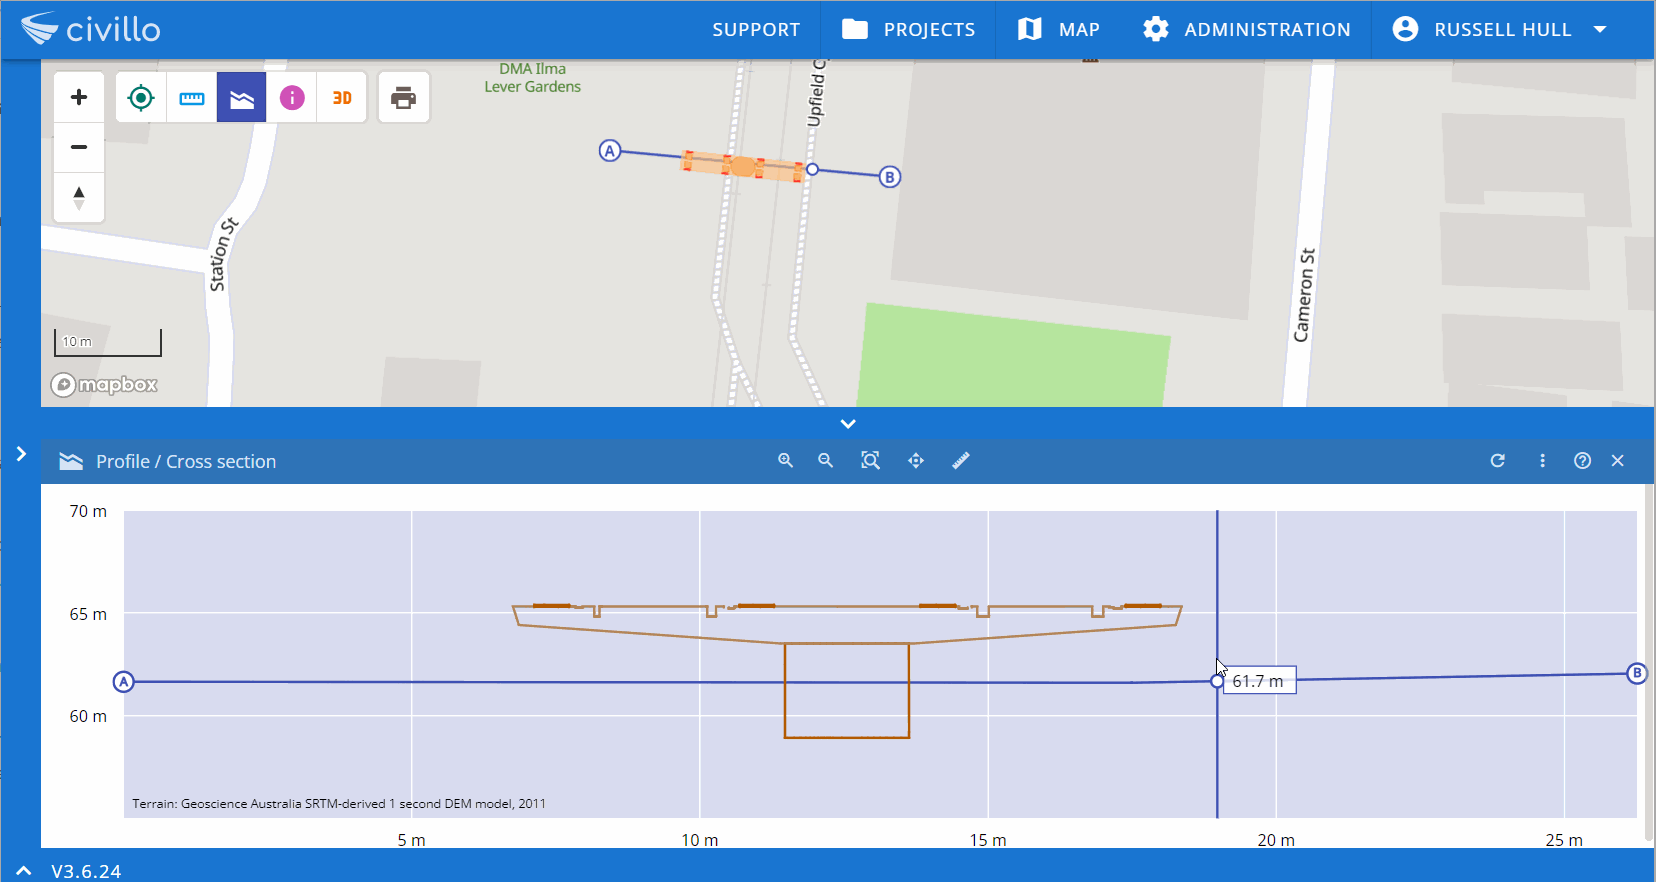
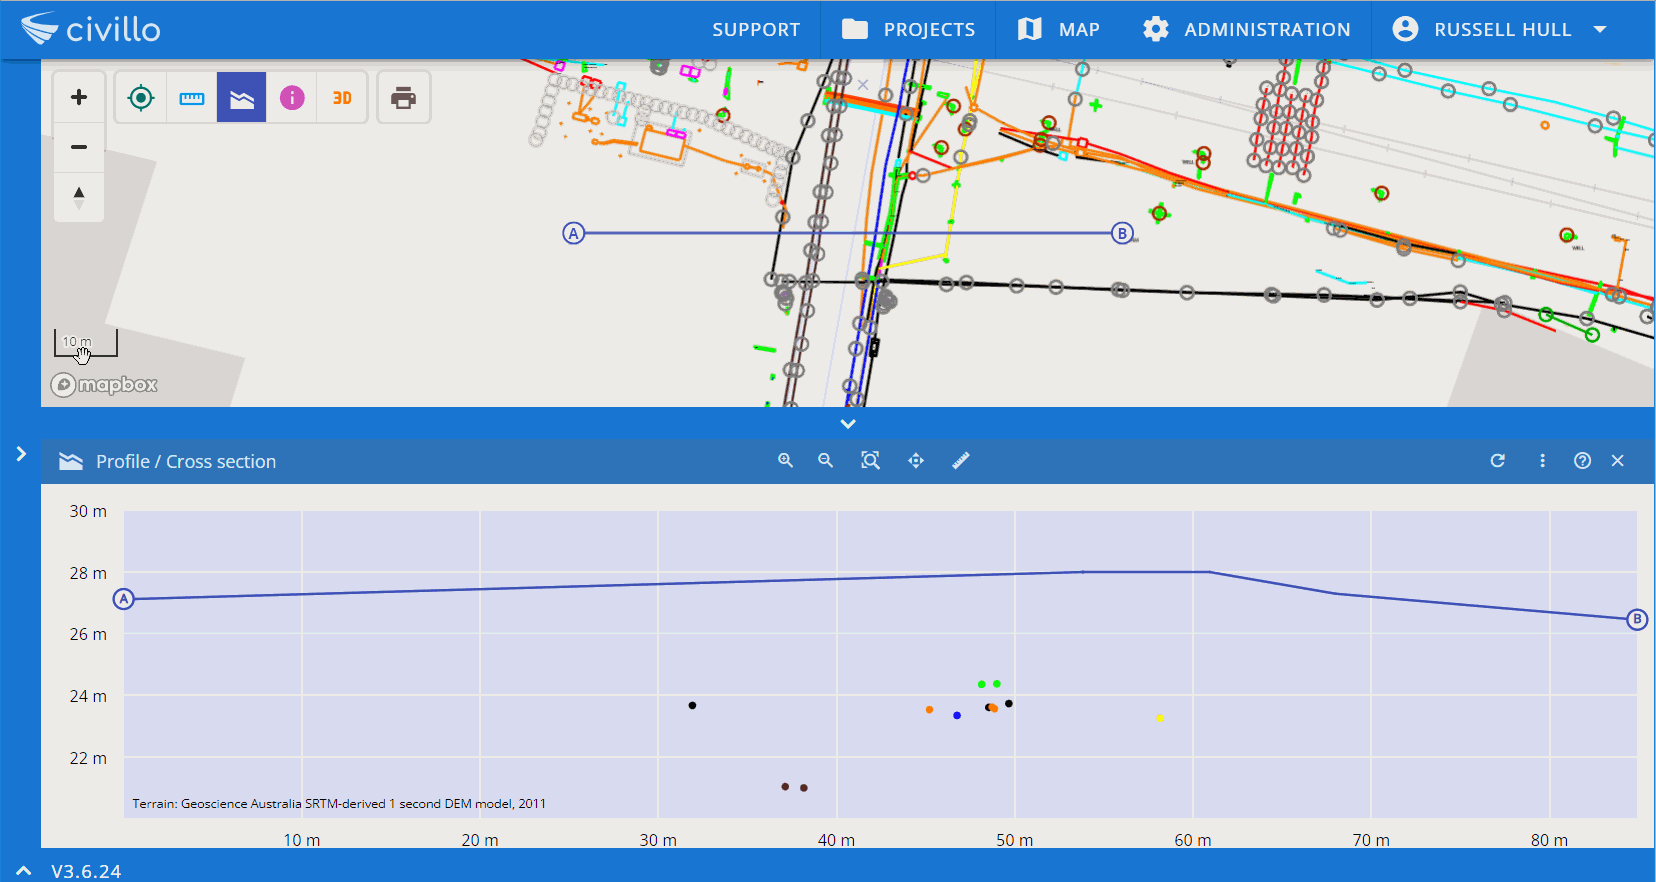
In Civillo, a cross‐section is a plane that cuts vertically through the map to reveal a two-dimensional grid of the assets that intersect with the vertical plane.
Using cross-sections in Civillo is easy, add / remove cross-section markers, toggle on or off the hit-line, relative heights, label features, or change the default terrain.
# Cross-section markers
Click on the terrain icon to activate the cross-section panel.
Markers can be removed by right-clicking on the marker label (or next to the marker when in 3D mode).
# Hit-line
The Civillo hit-line labels all elements that the hover line intersects with, each label contains the element sub-layer and the elements reduced level height (RL).
# Relative-Heights
Adjust the hit-line height to indicate the relative fall or gain from the loaded default terrain.
# Auto-Labels
Label the cross-section elements (with reduced levels) for download in either PDF or PNG format.
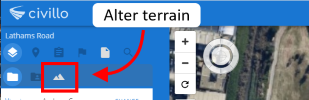
# Change Terrains
Alter the terrain within the cross-section by changing the Terrain dropdown selection.